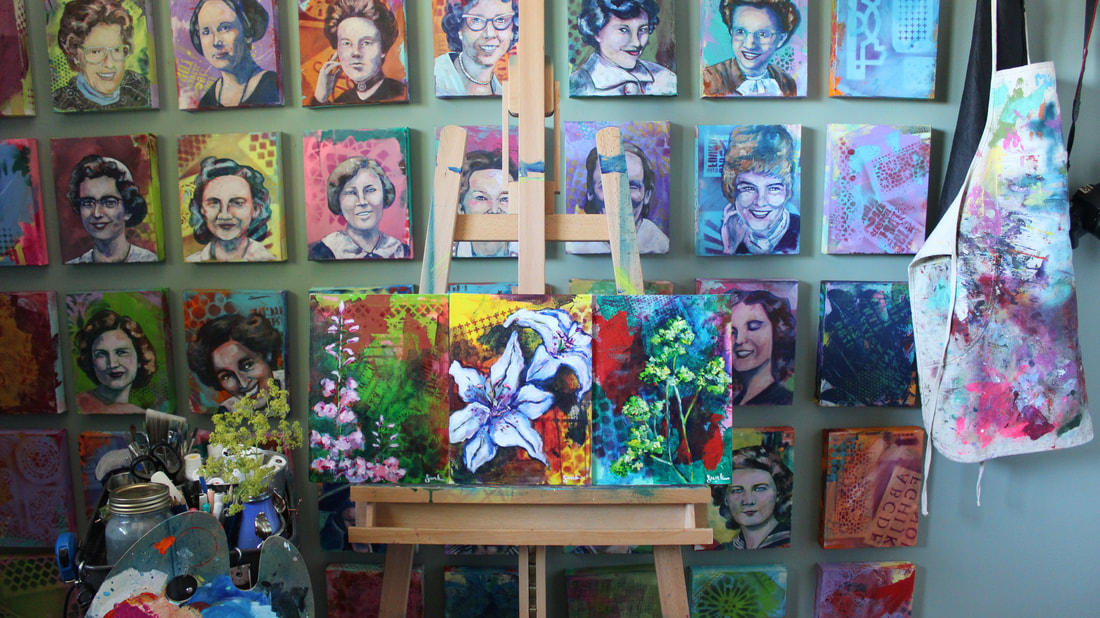
In college many, many years ago I was often referred to as ‘the flower painter’…it wasn’t because my work was necessarily the best, but rather because I enjoyed the process so much. My family has allergies which doesn’t allow me to bring flowers into my home, but I can enjoy them in my garden and in my artwork. I really like the fact that there is no perfection in them, and in fact, the imperfections just seem to add to their beauty.
Tools & Materials:
In my introduction I mentioned the importance of a rag twice…it wasn’t on purpose but it is a valuable part of my artist’s toolbox. My favourites are cut from my husband’s old cotton t-shirts as they don’t lose bits of fibre in my painting and they are very absorbent and can be thrown in the laundry with the rest of my painting clothes.
Additional Tips:
Directions:
Tools & Materials:
- Canvas panels (options: paper, stretched canvas, or wood)
- Acrylic paints
- Flat and round paint brushes
- Water dish, rag & water spray bottle
- Reference flowers or photos
- Stencils
- Acrylic paint, spray paint or air brush
- Brayer or small paint roller, palette knife, gift cards (optional)
In my introduction I mentioned the importance of a rag twice…it wasn’t on purpose but it is a valuable part of my artist’s toolbox. My favourites are cut from my husband’s old cotton t-shirts as they don’t lose bits of fibre in my painting and they are very absorbent and can be thrown in the laundry with the rest of my painting clothes.
Additional Tips:
- I use a couple of different sizes of paint brushes for added interest.
- A stencil brush and acrylic paint can be used to add pattern or simply add patterns by using paint brushes and container lids instead of stencils.
- If using paper, I do recommend a bit of a heavier weight like watercolour or mixed media papers along with coating the surface or substrate with a layer of white gesso to add texture and substance to the surface.
- Even though I don’t always follow this advice, I do recommend cleaning your water dish regularly to keep paint colours vibrant.
- Whenever I feel the need to make the background feel more cohesive, after I have finished painting a flower, I will cover the entire surface behind it with a glaze of transparent paint.
- I will sometimes sketch out flowers to plan my painting, but usually find that any little ‘mistakes’ add to the completed painting.
Directions:
- Using acrylic paint and brushes and brayers/rollers and plenty of water (a spray water bottle also works well), apply colour liberally on the canvas.
- Allow to dry well in between layers of colour in order to keep colours vibrant.
- Using a translucent paint (or acrylic ink) and flat brush, add a transparent layer of colour in spots around the canvas (don’t cover all of the initial layer). Wet with plenty of water and allow the colour to spread and drip.
- Once that layer has dried, use your stencils and spray paint or airbrush to a well-ventilated area to add stenciled patterns. Pay attention to repeating pattern and colour around the canvas in order to keep the image interesting and the viewer’s eye moving around the surface. An option is to use the stencils with a paintbrush or sponge or to use items around the house such as jug lids, spatulas and brushes to add patterns of lines and circles. Finger tips create great dots.
- Using either the flower or the reference photo and a small round or flat brush along with a colour such as dioxazine purple, pthalo green, pthalo or Prussian blue or alizarin crimson to draw directly onto the canvas. If the background is dark, I also like to use titanium white to draw my image. If you are unhappy with a line, just wet and wipe away with a rag. Once your drawing has dried, use a rich, transparent colours (like those listed above) to fill in the dark areas or shadows of your flower and background and, once that is dry, use a bit of colour mixed with white to add highlights. Keep in mind that it is better to add colour to the white rather than white to a colour as most colours tend to be quite strong.
- Finally, allow to dry and then add final highlights and add shadows or increase background contrast with thinned deep colour as needed.