When I started out on this creative journey it was difficult to find information & support as an artist. I read a lot, talked to many professional Artists & gallery Directors, tried many different things, and I think I've finally found my artistic 'sweet spot' both in my paintings and in my creative career. One thing that is important to me is to make sharing my experience accessible and also simple & straight forward...what I wished I had when I was starting out. The following 12 modules are included:
1. Finding inspiration
2. Tips & Tools
3. Setting up a studio
4. Creative exercises
5. Finding your (art) family
6. Creating an artistic career
7. Documenting & pricing artwork
8. Social media & the web
9. Researching & submitting proposals
10. Exhibiting work
11. Connecting with galleries
12. Suggested reading (more inspiration)
This PDF & videos are based loosely on my small book Sacred Vessel::A Painter's Handbook which can be previewed here.
FINDING INSPIRATION
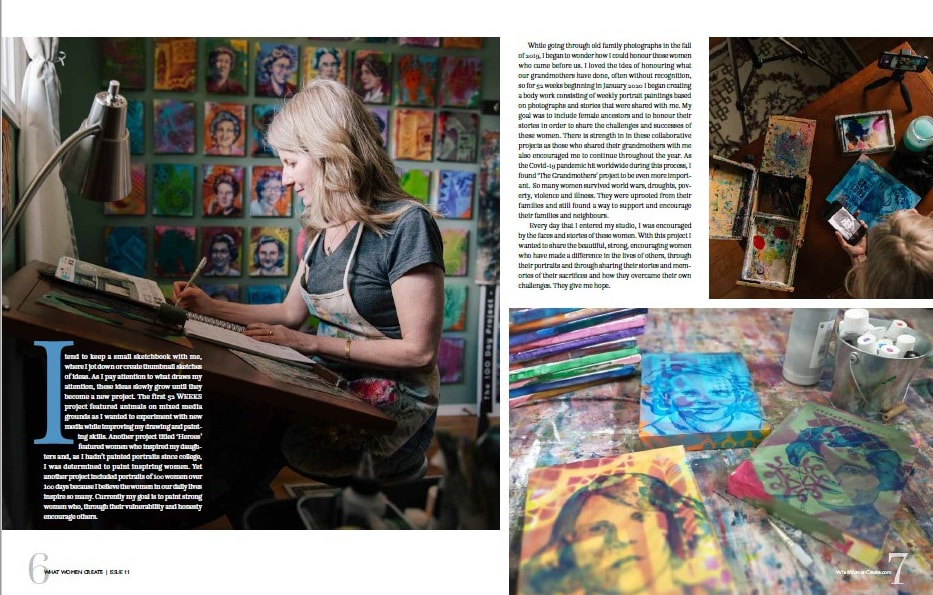
I began painting professionally in the mid-1980s, prior to the digital era, which was an interesting time. Creatively there was much experimentation and pushing boundaries, a new view of acrylic paint with major breakthroughs in its development (thankfully as it’s my favourite medium), and a huge push to develop personal style by creating regularly and a lot. Professors recommended visiting many galleries and museums, reading and learning, and sketching daily, things I still like to do.
As I tend to work in layers, I'm given much time to think about how and why I paint, which really boils down to inspiration. There are days I view other artists' work and am terribly disappointed in my own, and other days that viewing the work inspires me...thankfully the second is more common. It's not even that I'm inspired to paint how or what they do, but it does motivate me to get into my studio and begin working. Whenever I’m a little stuck in how I want to approach a painting, I began to look at my watercolour sketches and often receive an 'A-ha!' moment due to changing colour palettes and know immediately that I wanted to add layers of different colours. Sometimes I'm thrilled with the results although at other times I’m not. In some cases it is my own work that inspires a resolution but it can really also come from my interest in the things in which I choose to surround myself.
Words of wisdom.
A sculptor once said that whatever I wanted to do, I should just do it and a painter told me to pay attention to whatever gets my attention. These pieces of advice have kept me going, even during times that I felt a bit disconnected or unmotivated. In our world today, it is so great to be able walk around with a small moleskine sketchbook and a pen (which I keep on me as often as possible) or to take photos and notes with a cell phone.
Inspiration comes in daily activities, like walking to the grocery store or watching a movie with my daughter. Social media is wonderful for creative tips via youtube or vimeo videos. And one of my favourites is looking at old photographs and recalling childhood memories. The things I loved as a child are the things I still love today…the forest, lakes, stories, music, fashion, design, magazines and anything old with a history attached to it.
Talk to other artists…it doesn’t matter if the medium they work in is the same, whether they are a visual or performing artist I feel as though the challenges are similar. I also feel like creative blocks happen when we’re not allowing ourselves to have fun. Art should always be fun.
Learn something new.
Learning can be challenging…sometimes embarrassing…and it can require a lot of courage. I once read that courage means so many things…self-acceptance, asking for help, sharing your mistakes, admitting when you’re wrong, and allowing others to see your imperfections. I believe this applies to courage in creating and sharing artwork, too.
Learning something new is another way to fire up my creative juices, like taking workshops that are not at all related to the work that I do today. Pottery, jewellery, pyrography, creative writing, and working in other media are just a few of the things I’ve studied just for the fun of it. There is a connection that my brain makes which inspires an idea or a colour palette that I may have never considered previously.
Travel is probably one of the best ways to be inspired. It can include travelling outside of your country but also nearby. I love to walk through the forest in the Rocky Mountains which is only an hour away…I also like to visit galleries and museums while I travel.
Challenge perfectionist thinking.
One of the greatest challenges to finding inspiration, I believe, is not trusting ourselves and the ‘muse’ that draws our attention. We need to ask ourselves:
Those ‘A-ha!’ moments.
Something that was often recommended in art school was to create a body of work focusing on a series, something I still do and definitely supports personal creative growth. Often lessons I’ve learned on one painting can be brought forward to another, or if I feel stuck, I can put a piece aside and come back to it later. I’ve been studying psychology and have learned that there is something that happens in my brain which connects different neural pathways to create those ‘A-ha!’ moments. I love those!
Inspiration.
After taking several writing courses, I found that one of the exercises was particularly inspiring, not only for story telling but also for my paintings. Look at lists of words or prompts and sketch the first thing that comes to mind. Do any of these sketches inspire paintings, drawings, stories, etc.? Or a series of them?
Kitchen, chairs, tree, flowers, cups, walks, books, pets, family, children, home, house, nature, leaves, clothes, hands, feet, colour, history, movies, vehicle, streets, alley, weather, patterns, fabric, conversations, comics, cities, water, rain, lakes, cabins, sports, friends, recipes, photographs, faith, joy, sadness, memories, gifts, meals, laughter, darkness, wilderness, fantasy, future, mystery, truth, groceries, travel, places, sanctuary, furniture, seasons, fairy tales, garden, forest, flight, fashion, vacation, ship, farm.
Because I was taught of the value of working in series, to focus on a single subject matter in order to improve my skills, I still value working in that way. I pay attention to whatever it is that takes my attention and focus on that. This usually means noticing how the things that are important to me (such as the empowerment of women) typically are the things I read, view (in magazines, television, movies, etc) and discuss. These are the things that I want to spend more time on and naturally gravitate to so it becomes an organic part of my process as a painter. I also find it easier to discuss the body of work because it is so meaningful to me. Each time there are those periods during the process that I want to give up but, because I share the process publicly online, I find that knowing that others see what I’ve been doing helps keep me accountable.
The journey.
I want to close with this poem by Mary Oliver as it is about leaving things behind to begin on a new path:
One day you finally knew what you had to do, and began, though the voices around you kept shouting their bad advice – though the whole house began to tremble and you felt the old tug at your ankles.
“Mend my life!” each voice cried.
But you didn’t stop. You knew what you had to do, though the wind pried with its stiff fingers at the very foundations, though their melancholy was terrible, it was already late enough, and a wild night, and the road full of fallen branches and stones.
But, little by little, as you left their voices behind, the stars began to burn through the sheets of clouds, and there was a new voice which you slowly recognized as your own, that kept you company as you strode deeper and deeper into the world determined to do the only thing you could do – determined to save the only life you could save.
TIPS & TOOLS
Throughout my years as a professional artist, I have tried a variety of different media but always returned to painting with acrylics on canvas. Though I have worked with clay, jewellery, mixed media, stone carving, printmaking and fashion design, my main focus and greatest joy has always been painting on canvas so I will focus on painting here.
A Few of My Favourite Things.
I might admit to the fact that I am a bit obsessive about my art supplies. I typically like my paint tubes to be a single brand, though branch out on occasion. When I began creating the ‘Nasty Women’ project over a 100-day span, I stumbled upon Jane Davenport’s acrylic sets that came complete with some beige, pink, coral, blue, and purple tones which worked very well for me and were a bit thinner than the heavy body Liquitex acrylics I typically use. Also, occasionally I will pick up a few brighter colours of craft acrylics for underpainting, but in the end I always continue with the Liquitex.
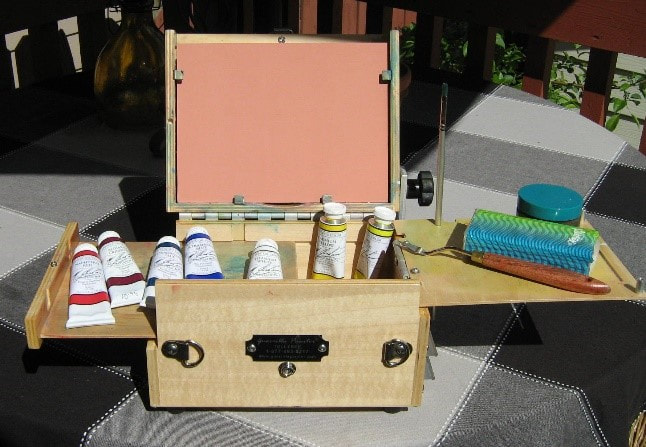
I began using Liquitex paints years ago when I recognized that my family wasn’t sensitive to them, like they had been to other professional grade acrylics (environmental allergies). I really appreciate the fact that the lids are larger which makes it easier for my double-jointed thumbs. In order to squeeze every little bit of paint from each tube I use a metal tube wringer which tends to come in handy throughout our home. I have also tried using tubs of paint but found that the lids were difficult for me and that the paint slowly thickened more than I liked. I also like the fact that I can place tubes in my ThumBox Pochade.
Which brings me to my Guerilla Painter 6x8 ThumBox pochade from Judson’s Plein Air. I use it to paint away from, but also just as much in my studio. It’s perfect for small pieces, and I also use it as my palette for larger works. It’s just so convenient to keep extra colour in as well as storing my paint rags (my cat tends to nibble on them). I keep calling it my laptop. They have changed the design slightly, making it smaller which is challenging for storage but would be easier for plein air painting.
My favourite brushes are inexpensive from Royal & Langnickel but work like a charm. They are short handled which makes it easier to fit into my pochade and nicer to hold (again, the double-jointed thumbs). They are easy to clean and keep a nice sharp edge. My favourite is a flat (¾ - 1 inch) and a small round (no. 8 - 12). The acrylic handle is especially nice as it doesn’t draw water to expand and then contract as it dries like wood does which also loosens the ferrule (the metal ‘neck’ piece that attaches the bristles to the handle). Another favourite brush is a Liquitex paddle brush as it holds a lot of paint and water.
As I also incorporate stencils into my work, I either cut them myself or use purchased ones which are readily available through art and craft stores as well as dollar stores. Since I felt that spray paint cans weren’t very good for the environment, I also now use an Iwata siphon fed neo airbrush with a portable Testor air compressor.
Stretching a canvas.
Back in my art school days one of my favorite tasks was stretching canvas. I loved the smell of the wood shop, it reminded me of home, and the physical activity of getting down and stretching the canvas. We also made our own gesso (canvas primer), though I've long forgotten the recipe and would love to do so again. After college, I used to stretch my own canvases all the time and enjoyed doing it - I felt even more connected to the work because I did it all myself. Though I no longer cut the stretcher bars for the frame, I still like to stretch my own canvases on occasion which comes in handy, especially when I have a commission for an unusual size. I prefer using 10 oz raw canvas and stretching with my fingers instead of using canvas pliers as I like a little give in the canvas while I paint and I find that once I gesso it, the canvas does pull tighter to the frame.
NOTE: If you have a stretched canvas, even one that's been painted on, and it loosens or bulges you may be able to tighten it by spraying the back of the canvas with water and allowing it to dry. There are also sprays available on the market made specifically for this (ie. Tight'N'Up Canvas Re-Tensioner).
1. Finding inspiration
2. Tips & Tools
3. Setting up a studio
4. Creative exercises
5. Finding your (art) family
6. Creating an artistic career
7. Documenting & pricing artwork
8. Social media & the web
9. Researching & submitting proposals
10. Exhibiting work
11. Connecting with galleries
12. Suggested reading (more inspiration)
This PDF & videos are based loosely on my small book Sacred Vessel::A Painter's Handbook which can be previewed here.
FINDING INSPIRATION
I began painting professionally in the mid-1980s, prior to the digital era, which was an interesting time. Creatively there was much experimentation and pushing boundaries, a new view of acrylic paint with major breakthroughs in its development (thankfully as it’s my favourite medium), and a huge push to develop personal style by creating regularly and a lot. Professors recommended visiting many galleries and museums, reading and learning, and sketching daily, things I still like to do.
As I tend to work in layers, I'm given much time to think about how and why I paint, which really boils down to inspiration. There are days I view other artists' work and am terribly disappointed in my own, and other days that viewing the work inspires me...thankfully the second is more common. It's not even that I'm inspired to paint how or what they do, but it does motivate me to get into my studio and begin working. Whenever I’m a little stuck in how I want to approach a painting, I began to look at my watercolour sketches and often receive an 'A-ha!' moment due to changing colour palettes and know immediately that I wanted to add layers of different colours. Sometimes I'm thrilled with the results although at other times I’m not. In some cases it is my own work that inspires a resolution but it can really also come from my interest in the things in which I choose to surround myself.
Words of wisdom.
A sculptor once said that whatever I wanted to do, I should just do it and a painter told me to pay attention to whatever gets my attention. These pieces of advice have kept me going, even during times that I felt a bit disconnected or unmotivated. In our world today, it is so great to be able walk around with a small moleskine sketchbook and a pen (which I keep on me as often as possible) or to take photos and notes with a cell phone.
Inspiration comes in daily activities, like walking to the grocery store or watching a movie with my daughter. Social media is wonderful for creative tips via youtube or vimeo videos. And one of my favourites is looking at old photographs and recalling childhood memories. The things I loved as a child are the things I still love today…the forest, lakes, stories, music, fashion, design, magazines and anything old with a history attached to it.
Talk to other artists…it doesn’t matter if the medium they work in is the same, whether they are a visual or performing artist I feel as though the challenges are similar. I also feel like creative blocks happen when we’re not allowing ourselves to have fun. Art should always be fun.
Learn something new.
Learning can be challenging…sometimes embarrassing…and it can require a lot of courage. I once read that courage means so many things…self-acceptance, asking for help, sharing your mistakes, admitting when you’re wrong, and allowing others to see your imperfections. I believe this applies to courage in creating and sharing artwork, too.
Learning something new is another way to fire up my creative juices, like taking workshops that are not at all related to the work that I do today. Pottery, jewellery, pyrography, creative writing, and working in other media are just a few of the things I’ve studied just for the fun of it. There is a connection that my brain makes which inspires an idea or a colour palette that I may have never considered previously.
Travel is probably one of the best ways to be inspired. It can include travelling outside of your country but also nearby. I love to walk through the forest in the Rocky Mountains which is only an hour away…I also like to visit galleries and museums while I travel.
Challenge perfectionist thinking.
One of the greatest challenges to finding inspiration, I believe, is not trusting ourselves and the ‘muse’ that draws our attention. We need to ask ourselves:
- Am I comparing myself or my work to someone else?
- Am I assuming the worst? Am I my own worst critic?
- Am I over thinking this method? Subject matter? Media?
- Is there more than one right way to do this?
- Can I look at this from another point of view?
Those ‘A-ha!’ moments.
Something that was often recommended in art school was to create a body of work focusing on a series, something I still do and definitely supports personal creative growth. Often lessons I’ve learned on one painting can be brought forward to another, or if I feel stuck, I can put a piece aside and come back to it later. I’ve been studying psychology and have learned that there is something that happens in my brain which connects different neural pathways to create those ‘A-ha!’ moments. I love those!
Inspiration.
After taking several writing courses, I found that one of the exercises was particularly inspiring, not only for story telling but also for my paintings. Look at lists of words or prompts and sketch the first thing that comes to mind. Do any of these sketches inspire paintings, drawings, stories, etc.? Or a series of them?
Kitchen, chairs, tree, flowers, cups, walks, books, pets, family, children, home, house, nature, leaves, clothes, hands, feet, colour, history, movies, vehicle, streets, alley, weather, patterns, fabric, conversations, comics, cities, water, rain, lakes, cabins, sports, friends, recipes, photographs, faith, joy, sadness, memories, gifts, meals, laughter, darkness, wilderness, fantasy, future, mystery, truth, groceries, travel, places, sanctuary, furniture, seasons, fairy tales, garden, forest, flight, fashion, vacation, ship, farm.
Because I was taught of the value of working in series, to focus on a single subject matter in order to improve my skills, I still value working in that way. I pay attention to whatever it is that takes my attention and focus on that. This usually means noticing how the things that are important to me (such as the empowerment of women) typically are the things I read, view (in magazines, television, movies, etc) and discuss. These are the things that I want to spend more time on and naturally gravitate to so it becomes an organic part of my process as a painter. I also find it easier to discuss the body of work because it is so meaningful to me. Each time there are those periods during the process that I want to give up but, because I share the process publicly online, I find that knowing that others see what I’ve been doing helps keep me accountable.
The journey.
I want to close with this poem by Mary Oliver as it is about leaving things behind to begin on a new path:
One day you finally knew what you had to do, and began, though the voices around you kept shouting their bad advice – though the whole house began to tremble and you felt the old tug at your ankles.
“Mend my life!” each voice cried.
But you didn’t stop. You knew what you had to do, though the wind pried with its stiff fingers at the very foundations, though their melancholy was terrible, it was already late enough, and a wild night, and the road full of fallen branches and stones.
But, little by little, as you left their voices behind, the stars began to burn through the sheets of clouds, and there was a new voice which you slowly recognized as your own, that kept you company as you strode deeper and deeper into the world determined to do the only thing you could do – determined to save the only life you could save.
TIPS & TOOLS
Throughout my years as a professional artist, I have tried a variety of different media but always returned to painting with acrylics on canvas. Though I have worked with clay, jewellery, mixed media, stone carving, printmaking and fashion design, my main focus and greatest joy has always been painting on canvas so I will focus on painting here.
A Few of My Favourite Things.
I might admit to the fact that I am a bit obsessive about my art supplies. I typically like my paint tubes to be a single brand, though branch out on occasion. When I began creating the ‘Nasty Women’ project over a 100-day span, I stumbled upon Jane Davenport’s acrylic sets that came complete with some beige, pink, coral, blue, and purple tones which worked very well for me and were a bit thinner than the heavy body Liquitex acrylics I typically use. Also, occasionally I will pick up a few brighter colours of craft acrylics for underpainting, but in the end I always continue with the Liquitex.
I began using Liquitex paints years ago when I recognized that my family wasn’t sensitive to them, like they had been to other professional grade acrylics (environmental allergies). I really appreciate the fact that the lids are larger which makes it easier for my double-jointed thumbs. In order to squeeze every little bit of paint from each tube I use a metal tube wringer which tends to come in handy throughout our home. I have also tried using tubs of paint but found that the lids were difficult for me and that the paint slowly thickened more than I liked. I also like the fact that I can place tubes in my ThumBox Pochade.
Which brings me to my Guerilla Painter 6x8 ThumBox pochade from Judson’s Plein Air. I use it to paint away from, but also just as much in my studio. It’s perfect for small pieces, and I also use it as my palette for larger works. It’s just so convenient to keep extra colour in as well as storing my paint rags (my cat tends to nibble on them). I keep calling it my laptop. They have changed the design slightly, making it smaller which is challenging for storage but would be easier for plein air painting.
My favourite brushes are inexpensive from Royal & Langnickel but work like a charm. They are short handled which makes it easier to fit into my pochade and nicer to hold (again, the double-jointed thumbs). They are easy to clean and keep a nice sharp edge. My favourite is a flat (¾ - 1 inch) and a small round (no. 8 - 12). The acrylic handle is especially nice as it doesn’t draw water to expand and then contract as it dries like wood does which also loosens the ferrule (the metal ‘neck’ piece that attaches the bristles to the handle). Another favourite brush is a Liquitex paddle brush as it holds a lot of paint and water.
As I also incorporate stencils into my work, I either cut them myself or use purchased ones which are readily available through art and craft stores as well as dollar stores. Since I felt that spray paint cans weren’t very good for the environment, I also now use an Iwata siphon fed neo airbrush with a portable Testor air compressor.
Stretching a canvas.
Back in my art school days one of my favorite tasks was stretching canvas. I loved the smell of the wood shop, it reminded me of home, and the physical activity of getting down and stretching the canvas. We also made our own gesso (canvas primer), though I've long forgotten the recipe and would love to do so again. After college, I used to stretch my own canvases all the time and enjoyed doing it - I felt even more connected to the work because I did it all myself. Though I no longer cut the stretcher bars for the frame, I still like to stretch my own canvases on occasion which comes in handy, especially when I have a commission for an unusual size. I prefer using 10 oz raw canvas and stretching with my fingers instead of using canvas pliers as I like a little give in the canvas while I paint and I find that once I gesso it, the canvas does pull tighter to the frame.
NOTE: If you have a stretched canvas, even one that's been painted on, and it loosens or bulges you may be able to tighten it by spraying the back of the canvas with water and allowing it to dry. There are also sprays available on the market made specifically for this (ie. Tight'N'Up Canvas Re-Tensioner).
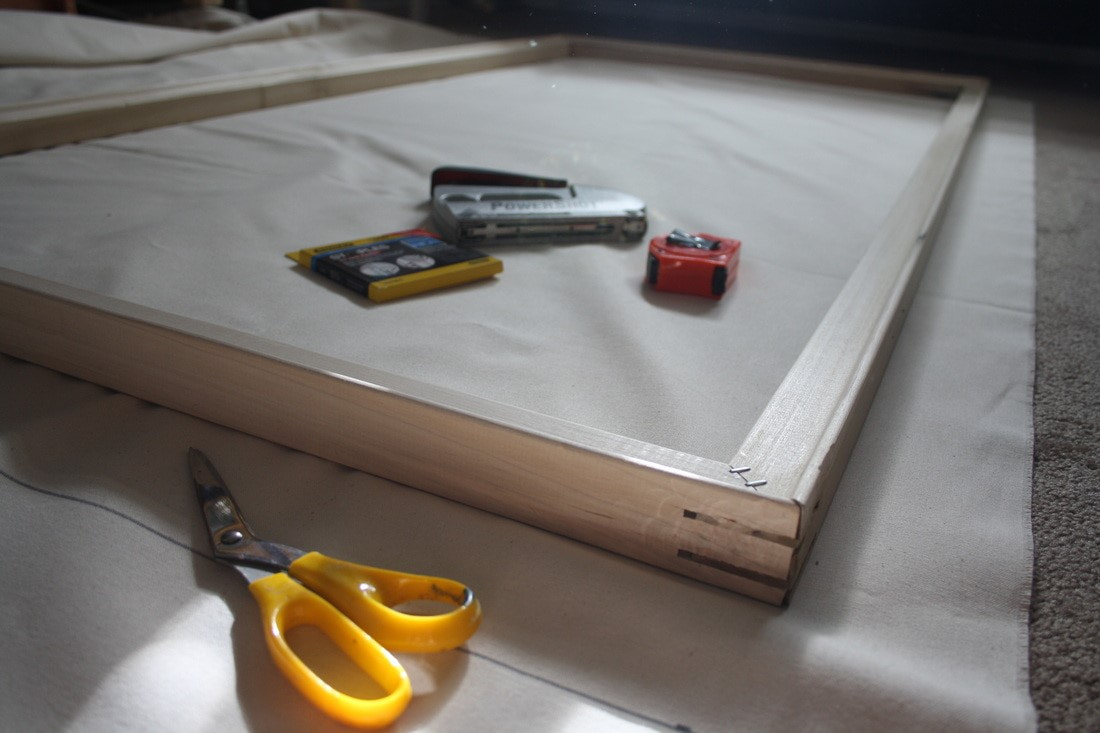
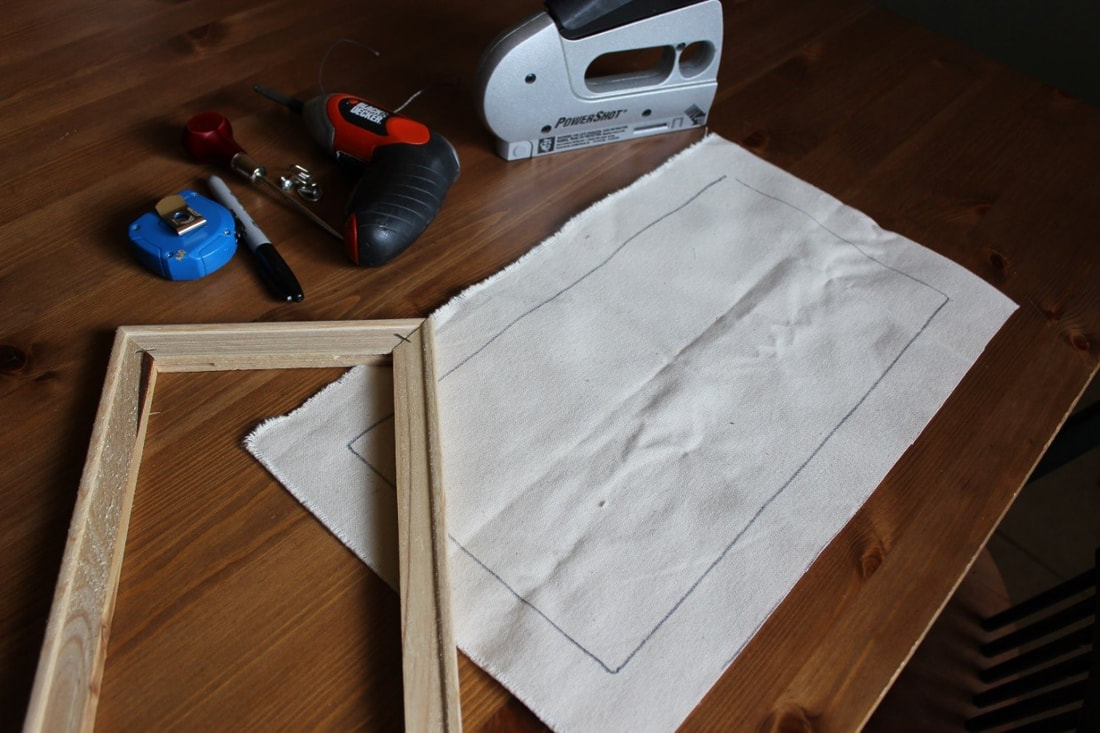

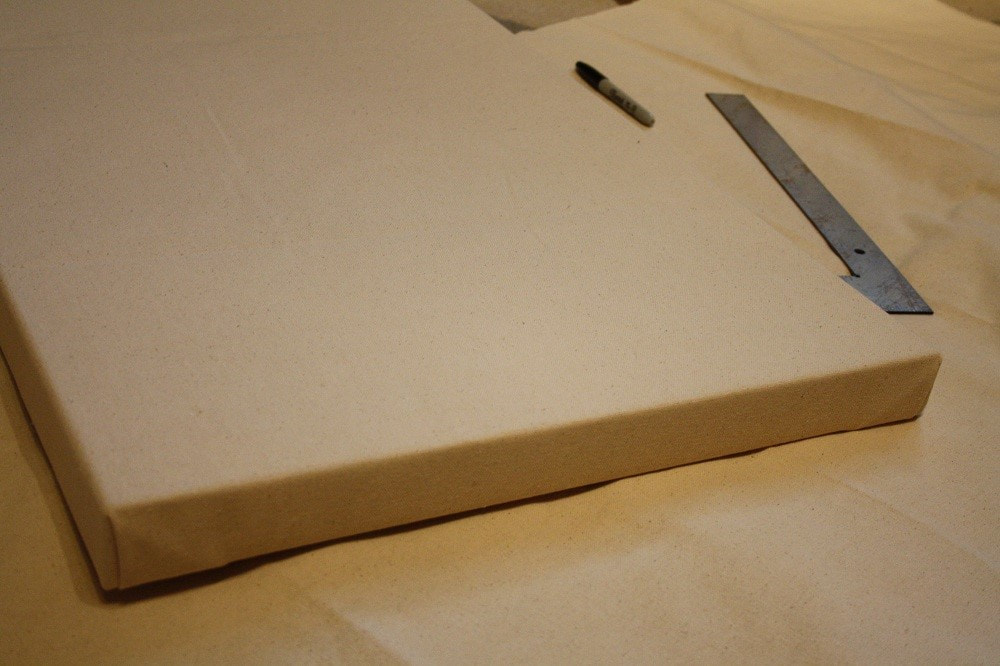
STEP 1: Measure up the sides and the back of the stretcher bars. In this case, I'm using a gallery-depth frame where the bars are 2 inches square so I measured and added 4 inches all around the canvas so that the canvas I cut measured 8 inches wider and longer than the actual size of the prepared stretcher bars. Mark your measurements and cut out the canvas. I like to use a framing square to create sharper corners and its weight also holds down the canvas while I mark my measurements. Both the canvas and stretcher bars are available at most art supply stores.
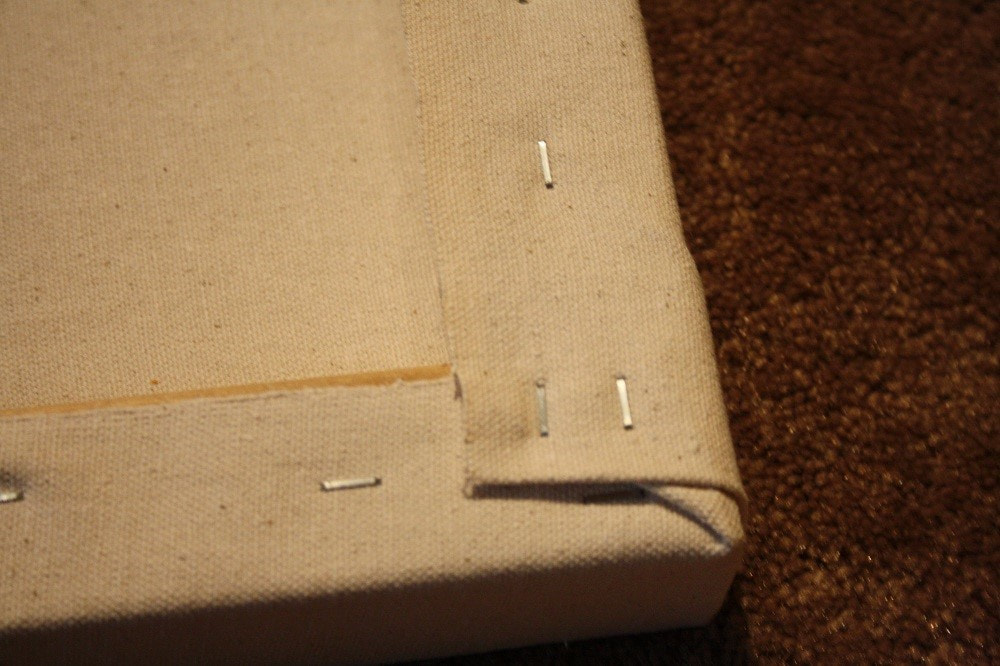
STEP 2: Center the stretcher bars on the canvas and begin by placing three staples on the center of the longest edge of your frame beginning in the middle and moving out from there. On the opposite side pull the canvas taught and place three more staples along that edge. Keep an eye on the entire canvas as you stretch and staple to avoid adding any wrinkles. If you are stretching to a smaller frame, place your staples closer together.
STEP 3: Repeat on the other two shorter sides. Continue stapling in this fashion, adding a few staples on the longest sides and then a couple on the two shorter sides. In this case, because two of the sides were quite a bit longer I placed two staples to the right and two to the left of the initial staples, while on the shorter sides I only placed one staple to each side of the initial staples.
STEP 4: Continue adding a staple rotating the sides of the canvas until you are approximately 2-4 inches from the corners depending on the size of your frame.
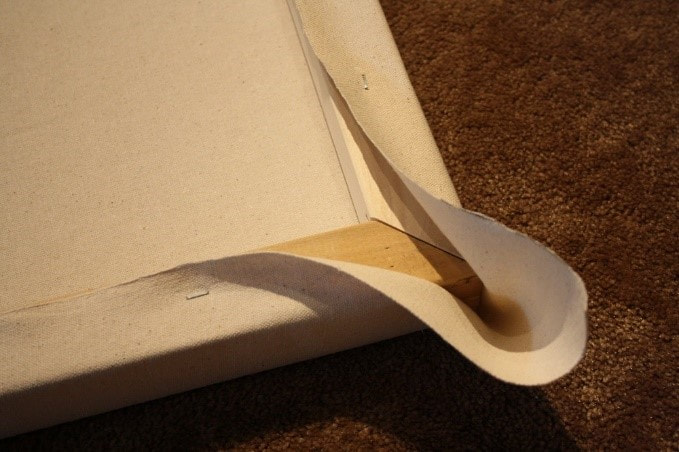
STEP 5: The corners are where people tend to get a bit confused but they really are quite simple once you know the technique. I tend to do all the corners at once so that I make sure the folds are all facing the same direction. I pull the canvas taught along the longest edge of the frame and secure it well with two staples and then place a third vertically along the edge of the frame.
STEP 6: I then pull the canvas diagonally from the corner of the frame and across the secured staples and place another staple to hold that edge. Be sure to pull your canvas very tight.
STEP 7: Finally, I pull the remainder of the canvas over the frame and secure it well with two more staples.
STEP 2: Center the stretcher bars on the canvas and begin by placing three staples on the center of the longest edge of your frame beginning in the middle and moving out from there. On the opposite side pull the canvas taught and place three more staples along that edge. Keep an eye on the entire canvas as you stretch and staple to avoid adding any wrinkles. If you are stretching to a smaller frame, place your staples closer together.
STEP 3: Repeat on the other two shorter sides. Continue stapling in this fashion, adding a few staples on the longest sides and then a couple on the two shorter sides. In this case, because two of the sides were quite a bit longer I placed two staples to the right and two to the left of the initial staples, while on the shorter sides I only placed one staple to each side of the initial staples.
STEP 4: Continue adding a staple rotating the sides of the canvas until you are approximately 2-4 inches from the corners depending on the size of your frame.
STEP 5: The corners are where people tend to get a bit confused but they really are quite simple once you know the technique. I tend to do all the corners at once so that I make sure the folds are all facing the same direction. I pull the canvas taught along the longest edge of the frame and secure it well with two staples and then place a third vertically along the edge of the frame.
STEP 6: I then pull the canvas diagonally from the corner of the frame and across the secured staples and place another staple to hold that edge. Be sure to pull your canvas very tight.
STEP 7: Finally, I pull the remainder of the canvas over the frame and secure it well with two more staples.
Wiring a canvas.
Many years ago, I was taught by gallery directors and framers how to wire artwork...these are the rules I still follow today. My tools include a measuring tape, marker, awl, single- or double-hole D-rings + screws, mid-weight picture hanging wire and cordless screwdriver with two bits - star and square (use depends on the screws that come with the D-rings). Most of these items are available in hardware or craft stores.
The first thing I do is measure the height of the piece and divide that number by three as the hardware should be attached 1/3 of the way down the back of the artwork in order to hang properly. Using my marker, I place a small mark at that point.
Whenever I attach hardware to larger pieces (ie. 5 feet or larger) I use the double hole D-rings and attach them vertically without using any wire. This way the piece always hangs straight and doesn't tilt every time a door is closed.
Fortunately, because I work on stretched canvas, the painting doesn't typically weigh too much so I can usually use smaller D-rings. At this point, I hold the ring in place while I use my awl to place an indent onto the wooden stretcher bar through the hole on the D-ring.
The awl indent makes placing the screw easier as sometimes the kiln dried stretcher bars can be a little tough so I occasionally need both hands to apply pressure to the screw head.
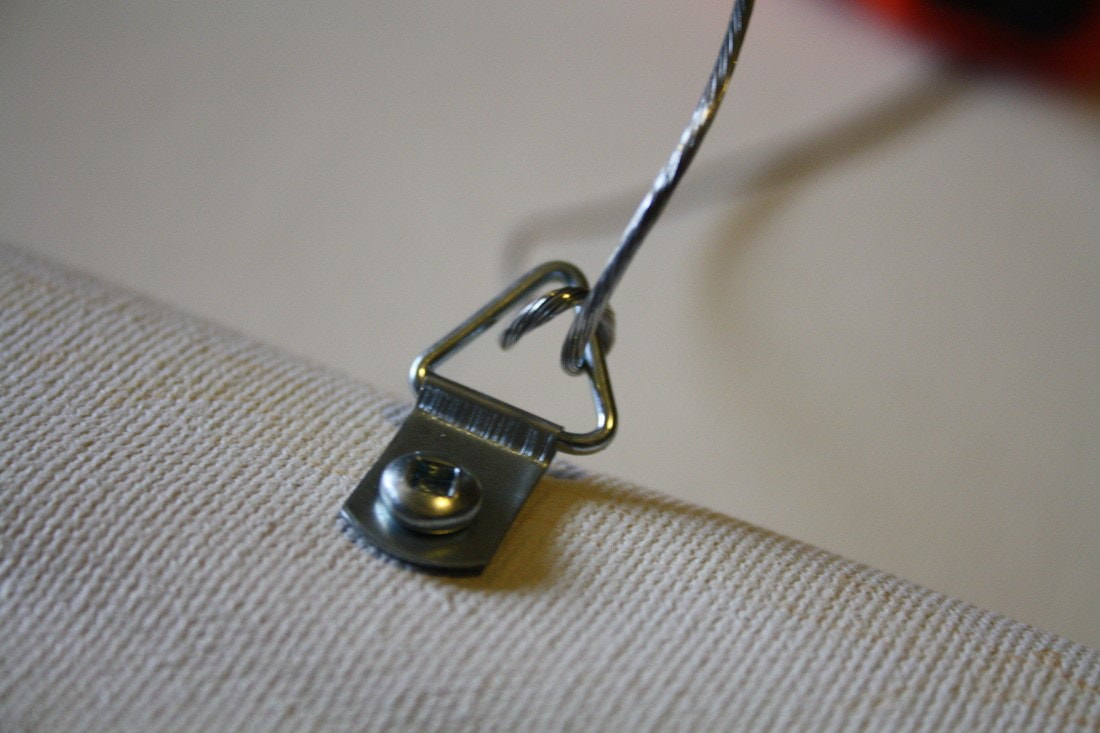
I typically pull the hanging wire up through the bottom (near the canvas) of the D-ring so there is a tail of at least 4-5 inches (depending on the size of canvas).
In order to keep the wire from slipping loose, I wrap the wire around and pull it through a second time. I pull the wire fairly taught but leave a little room for give so that the piece is easier to hang onto a hook on the wall. If I'm wiring a number of pieces of the same size, I will hook my measuring tape onto the wire and measure to the top of the painting just to be sure the pieces will be easier to hang when exhibited.
Wrap the wire tightly so that the possibility of stretching is minimized. Some people wrap tape around the wire and though I don't I do sometimes use a crimper to tighten the wire.
And finally, I label the top (back) of every piece with the title, date, and my name. This same method of wiring is applied even if the piece is framed, just utilizing the exterior measurements of the frame instead of the actual artwork. If there are any questions, please let me know and I will try to answer them as best I can.
Creating a Curriculum Vitae.
When I first began thinking about submitting artwork to galleries I began to read as many books on the subject and to speak to professional artists and gallery directors to find out what they needed to see. It was the time before computers and the internet were accessible to everyone and so I was developing slides of my work and preparing packages for submission. It's much easier now, when it all can be added to my website. With the packages, I had to include a stamped envelope if I wanted the package returned to me, which I did as the slides were not inexpensive and at times the paintings sold between the time the package was sent and returned. I learned that a Curriculum Vitae or CV (Latin for ‘the course of your life’) was basically my resume which included any exhibits, professional experience, education, affiliations and a chronological list of exhibits. The Biography was basically a short story of my life and how I came to be an artist.
Writing an Artist’s Statement.
I'm often asked how to write an artist's statement and though there are many different suggestions online and in art books the way I choose to write mine is very simple. Before I’ve begun, during the process of the painting and after I've completed a number of pieces in a new body of work (fifteen or more) I take notes. I pay attention to my colour choices, the images or symbols I'm drawn to, the marks I make and tools I use, thoughts I have...really, I write from the heart. I know there are many statements that are very professorial, like a Master’s Thesis, but I prefer to write in layman's terms, using language I'm comfortable with, including my memories and experiences. I want to share why I'm doing the work I do and what the impetus for it is as many of the collectors like to hear the stories behind it. I feel the same whenever I collect another artist's work, it makes it even more special for me. More personal. And the Artist's Statement is the story of the impetus to the current body of work. Plus, it allows the galleries to share the story and is a nice way to connect the work further with the patrons. It surprises me how often people, whether they are familiar with original art or not, connect with the work in spite of the words but once I share the story, there is often an 'aha' moment for them. They have felt it. Writing an Artist’s Statement is really about answering a few questions: WHY did you or do you want to create this? HOW did you do it (include materials and process)? WHAT or WHO were you inspired by? WHERE did you create or come up with this idea? WHEN will or did you create it? You don’t need to answer all the questions, but make sure to include what is important about this body of work to you. It shouldn’t be longer than a page and it should be able to be reduced to a couple of sentences in order to introduce the work to others.
SETTING UP A STUDIO SPACE
As an artist I have worked anywhere from the dining area of my first apartment with plastic bags taped on the wall and a large picture hook to hang the work in progress to a closet and several sizes of studio spaces. There was actually something positive about each.
The work in the dining area was nice as I could view works in progress regularly to see where I was and decide which direction I was heading. My supplies were in a small rolling cart right beside the painting so it inspired me to keep working, even after a long day at my job. The only problem was that sometimes I needed a break from the work, so I would cover it in a sheet.
The closet was great because I am easily overwhelmed by too many things and, so, I could close the doors whenever I needed a break or didn’t exactly feel like tidying up. My challenge was that I also like to work large, which this space didn’t accommodate.
Previous studios have been near my children’s play space, the kitchen, a corner of a room and currently is in the basement. This one is the best because I have a lot of space to store work as well as move things around and with large windows the light is quite nice. It’s not great because being near the kitchen is handy when I’m preparing meals so that I can continue to work in between preparing items.
Lighting can be an issue and it doesn’t seem to matter where my studio is located as the sun moves depending on the seasons. When it is too direct, it washes out the colours on my palette, when it sits too high in the sky, my space can be a bit dark. I tend to take photographs of completed work outside in natural light as the colours tend to be more accurate.
Regardless of the spaces I have lived in, I have always created a spot to paint. From my dorm room in college, to my first apartment and then to a house, there have been positives and negatives in each. I have found, though, that the important thing is to have a space set aside so that I am always inspired to work.
Studio furniture.
I don’t believe there is a perfect solution but I have found that, for me, having studio furniture that can move, such as a pochade (my small paint box is by Judson’s Art Outfitters) to take on trips or to work on smaller pieces anywhere, or a collapsible easel that I can set up anywhere works best for me. I also have a cart which stores the bulk of my supplies…paint, water dish, rags, pens & pencils, sketchbooks, gesso, gel media, ink and small canvases. Because it is on wheels, it can easily be moved to accommodate my needs. I utilize both a standing easel and a drafting table, which sometimes becomes a catch-all for work in progress and supplies, but I do find it necessary to have a table of some sort. When I didn’t have the drafting table, I often worked in my dining room which made things a bit more difficult as I was running up and down for supplies when needed, which sometimes interrupted the creative process. That being said, sometimes a change of space actually inspires new ideas.
Many years ago, I was taught by gallery directors and framers how to wire artwork...these are the rules I still follow today. My tools include a measuring tape, marker, awl, single- or double-hole D-rings + screws, mid-weight picture hanging wire and cordless screwdriver with two bits - star and square (use depends on the screws that come with the D-rings). Most of these items are available in hardware or craft stores.
The first thing I do is measure the height of the piece and divide that number by three as the hardware should be attached 1/3 of the way down the back of the artwork in order to hang properly. Using my marker, I place a small mark at that point.
Whenever I attach hardware to larger pieces (ie. 5 feet or larger) I use the double hole D-rings and attach them vertically without using any wire. This way the piece always hangs straight and doesn't tilt every time a door is closed.
Fortunately, because I work on stretched canvas, the painting doesn't typically weigh too much so I can usually use smaller D-rings. At this point, I hold the ring in place while I use my awl to place an indent onto the wooden stretcher bar through the hole on the D-ring.
The awl indent makes placing the screw easier as sometimes the kiln dried stretcher bars can be a little tough so I occasionally need both hands to apply pressure to the screw head.
I typically pull the hanging wire up through the bottom (near the canvas) of the D-ring so there is a tail of at least 4-5 inches (depending on the size of canvas).
In order to keep the wire from slipping loose, I wrap the wire around and pull it through a second time. I pull the wire fairly taught but leave a little room for give so that the piece is easier to hang onto a hook on the wall. If I'm wiring a number of pieces of the same size, I will hook my measuring tape onto the wire and measure to the top of the painting just to be sure the pieces will be easier to hang when exhibited.
Wrap the wire tightly so that the possibility of stretching is minimized. Some people wrap tape around the wire and though I don't I do sometimes use a crimper to tighten the wire.
And finally, I label the top (back) of every piece with the title, date, and my name. This same method of wiring is applied even if the piece is framed, just utilizing the exterior measurements of the frame instead of the actual artwork. If there are any questions, please let me know and I will try to answer them as best I can.
Creating a Curriculum Vitae.
When I first began thinking about submitting artwork to galleries I began to read as many books on the subject and to speak to professional artists and gallery directors to find out what they needed to see. It was the time before computers and the internet were accessible to everyone and so I was developing slides of my work and preparing packages for submission. It's much easier now, when it all can be added to my website. With the packages, I had to include a stamped envelope if I wanted the package returned to me, which I did as the slides were not inexpensive and at times the paintings sold between the time the package was sent and returned. I learned that a Curriculum Vitae or CV (Latin for ‘the course of your life’) was basically my resume which included any exhibits, professional experience, education, affiliations and a chronological list of exhibits. The Biography was basically a short story of my life and how I came to be an artist.
Writing an Artist’s Statement.
I'm often asked how to write an artist's statement and though there are many different suggestions online and in art books the way I choose to write mine is very simple. Before I’ve begun, during the process of the painting and after I've completed a number of pieces in a new body of work (fifteen or more) I take notes. I pay attention to my colour choices, the images or symbols I'm drawn to, the marks I make and tools I use, thoughts I have...really, I write from the heart. I know there are many statements that are very professorial, like a Master’s Thesis, but I prefer to write in layman's terms, using language I'm comfortable with, including my memories and experiences. I want to share why I'm doing the work I do and what the impetus for it is as many of the collectors like to hear the stories behind it. I feel the same whenever I collect another artist's work, it makes it even more special for me. More personal. And the Artist's Statement is the story of the impetus to the current body of work. Plus, it allows the galleries to share the story and is a nice way to connect the work further with the patrons. It surprises me how often people, whether they are familiar with original art or not, connect with the work in spite of the words but once I share the story, there is often an 'aha' moment for them. They have felt it. Writing an Artist’s Statement is really about answering a few questions: WHY did you or do you want to create this? HOW did you do it (include materials and process)? WHAT or WHO were you inspired by? WHERE did you create or come up with this idea? WHEN will or did you create it? You don’t need to answer all the questions, but make sure to include what is important about this body of work to you. It shouldn’t be longer than a page and it should be able to be reduced to a couple of sentences in order to introduce the work to others.
SETTING UP A STUDIO SPACE
As an artist I have worked anywhere from the dining area of my first apartment with plastic bags taped on the wall and a large picture hook to hang the work in progress to a closet and several sizes of studio spaces. There was actually something positive about each.
The work in the dining area was nice as I could view works in progress regularly to see where I was and decide which direction I was heading. My supplies were in a small rolling cart right beside the painting so it inspired me to keep working, even after a long day at my job. The only problem was that sometimes I needed a break from the work, so I would cover it in a sheet.
The closet was great because I am easily overwhelmed by too many things and, so, I could close the doors whenever I needed a break or didn’t exactly feel like tidying up. My challenge was that I also like to work large, which this space didn’t accommodate.
Previous studios have been near my children’s play space, the kitchen, a corner of a room and currently is in the basement. This one is the best because I have a lot of space to store work as well as move things around and with large windows the light is quite nice. It’s not great because being near the kitchen is handy when I’m preparing meals so that I can continue to work in between preparing items.
Lighting can be an issue and it doesn’t seem to matter where my studio is located as the sun moves depending on the seasons. When it is too direct, it washes out the colours on my palette, when it sits too high in the sky, my space can be a bit dark. I tend to take photographs of completed work outside in natural light as the colours tend to be more accurate.
Regardless of the spaces I have lived in, I have always created a spot to paint. From my dorm room in college, to my first apartment and then to a house, there have been positives and negatives in each. I have found, though, that the important thing is to have a space set aside so that I am always inspired to work.
Studio furniture.
I don’t believe there is a perfect solution but I have found that, for me, having studio furniture that can move, such as a pochade (my small paint box is by Judson’s Art Outfitters) to take on trips or to work on smaller pieces anywhere, or a collapsible easel that I can set up anywhere works best for me. I also have a cart which stores the bulk of my supplies…paint, water dish, rags, pens & pencils, sketchbooks, gesso, gel media, ink and small canvases. Because it is on wheels, it can easily be moved to accommodate my needs. I utilize both a standing easel and a drafting table, which sometimes becomes a catch-all for work in progress and supplies, but I do find it necessary to have a table of some sort. When I didn’t have the drafting table, I often worked in my dining room which made things a bit more difficult as I was running up and down for supplies when needed, which sometimes interrupted the creative process. That being said, sometimes a change of space actually inspires new ideas.
I’ve had several different styles of studio easels and have also hung work in progress on the walls, but have found my favourite to be an a-frame that can collapse for storage or travel. It’s sturdy and allows for large canvases as I tend to enjoy working on surfaces that measure up to 48x60 inches. I also have travel, display and tabletop easels as well as a drafting table but would love to find one that could be used for all these purposes as I tend to prefer simplicity and multi-use items.
Lighting.
Throughout the years I have tried all sorts of lighting solutions from up lighting (a floor lamp) to neck lights and track lights. One of the things I invested in many years ago was an OTT light. It casts nice clean north inspired light, which is ideal for more accurate colours. My favourite, though, is still natural light and I tend to move around until I can find it. It doesn’t matter which direction it’s coming from (north, west, east, south) as long as it is indirect. For photographs I occasionally use the OTT light when the skies are too grey – the top photo with my drafting table was taken in natural light, the photo above with my easel was taken using the OTT light.
In the summer I tend to move around and work where the light is best but in the winter I tend to remain in my studio, which can be a bit challenging at times as far as lighting. Currently I have a small set of track lights that I can adjust as needed, a gooseneck lamp attached to my drafting table, an OTT light that folds flat when not in use but is also very easily moved where required, a floor lamp that reflects light off the white ceiling and a table lamp. This combination seems to work well with the south facing window.
CREATIVE EXERCISES
“I don’t start with a color order,
but find the colors as I go.”
~Helen Frankenthaler
When I was in art college, we practiced a variety of interesting exercises to loosen up and use our entire bodies when we were creating and others to help us to see and draw better. I like to use them when I work with kids as they always have fun with it, but it is also good for me, not only to loosen up but also to trust myself a little more when I work...it also helps the old hand-eye coordination which is vital as an artist.
A few of the things I have been thinking of were terrific to stretch our creative muscles:
* work with your non-dominant hand
* create your image upside down
* use a limited or monochromatic palette
* work larger
* work smaller
* try a different subject matter
* try a different medium
* try a different ground
It's all about forcing our hands and eyes to work together and about pushing ourselves. Sometimes the most magical things happen by accident.
1. Draw Eggs
Our instructors often told us if we could draw an egg realistically, including all the values of highlights, shading, shadows, cast shadows and reflected light, then we could draw anything. It's really not as easy as it sounds.
2. BIG!
We would often tape 4 large sheets of newsprint together and, with charcoal or paint, we would crawl around the paper and using our whole arm & body we would draw or paint. Lots of eggs, but flowers, fabric and skeletons, too.
3. Left Hand
Or right if you are left-handed. This allows you to focus on the object you are drawing rather than on repeating patterns from your past. The piece above (yes, eggs) was painted with my non-dominant hand in gouache and is the only piece I have left from school (my final portfolio was stolen...which was actually a compliment).
4. Switch
If you work with other artists, sometimes it's a good idea to set up a still life and work for 10 minutes, then switch with your partner (or if more than one, move from piece to piece) for two reasons. The first is to gain a different perspective of the object to help you understand the form more fully and the second is that it forces you to work in a slightly different manner based on someone else's beginning.
5. Contour
There are two ways of performing contour drawing, one is by looking at an object and then only drawing its outline (contour) while being able to look at the paper...the second is blind contour, so no looking at the paper. In both cases do not lift your pen/pencil from the page. It's a great exercise to see how the form (positive space) interacts with the negative space around it.
6. Self-portrait
This is one form of creativity that has been practiced by artists throughout time. It's best to use a mirror and draw, paint, collage, etc. A great way to learn that everything is made up of shapes and how different shapes interact with one another as well as how much space there is between each shape.
7. Mirror Image
One of the neatest tricks I learned was to turn my work to a mirror. There is something about a new perspective that helps to see the problem areas. I find it works well with colour as well...to see those parts that aren't working cohesively.
8. Shade First
This one is interesting...shade in your image before adding the drawing lines. Certainly helps to push the boundaries a little more and forces you to pay attention how the shapes of your object sit in proportion to one another.
9. Don't Look
Look at an item intensely for fifteen minutes and then turn away from it to draw (or paint) it. When you're stuck close your eyes and envision it. It's interesting to see how much we can remember if we really pay attention.
10. Draw EVERY Day
It doesn't matter what you draw, the physical act of drawing is important. You'll improve your hand-eye coordination, your shapes, values, lines, proportion, perspective and composition...all the basic elements of design.
FINDING YOUR (ART) FAMILY
“Call it a clan, call it a network, call it a tribe, call it a family:
Whatever you call it, whoever you are, you need one.”
~ Margaret Mead & Jane Howard
Over the past few years I have been studying psychology as part of the Bachelor of Fine Arts program I have been working towards. It’s been wonderful to learn about the fact that people are resilient in spite of difficult circumstances, as long as we have someone who supports and encourages us. A book I read recently shared suggestions for building friendships, and the big takeaway for me was that in order to make a friend we have to be one. It means taking the initiative (slowly) and being vulnerable by sharing our thoughts and feelings with others. You connect with others being taking an interest in their lives and by sharing yours.
As an artist I have found that it can sometimes be difficult to connect when I spend too much time working in my studio instead of making connections and contributions in my community. I have a few extremely close, long-term friends which have come to include my husband and daughters but there are times that I need to remind myself to get out into the world.
When I moved to my community there weren’t other professional artists living here. This meant travelling to the nearest city to connect with art groups, take workshops and to be involved in art markets. It was a wonderful way to connect with other creatives and to share our trials and successes with one another. As my community has grown through the years, I have had many opportunities to volunteer in the arts and to secure paid positions. I also found out which areas worked better with my personality and skill set as well as which didn’t suit me as well. In every instance, I learned something and made new friends. Some were artists while others were supporters of the arts.
Finding your group is especially important for support and encouragement, accountability and insight. They are the guides and mentors that will be there for you when you need them, and vice versa. Through shared experiences, they can lift you up and help you feel connected. I have found these people, both in my immediate environment and also in my online community, to be the ones who also celebrate my successes with me, even those that might feel small or insignificant. These are also the people who help me overcome failures, or perceived failures, in order to move forward.
Sometimes it is valuable to share an idea or ask for assistance but I do suggest discernment in choosing those people that you invite into your inner sanctum. Occasionally, I myself have been guilty of this, meaningful comments can be interpreted as criticism which can inadvertently block the creative process. Though the intentions may be good, they aren’t always recognized in that vein. I’ve learned this through trial and error, and though I do know I will continue to err on occasion, I do hope that I am still learning.
CREATING AN ARTISTIC CAREER
Researching the definition of being a professional artist, I have found several definitions but I found the following two to be quite interesting:
ARTS Nova Scotia:
A professional artist is an artist who has received compensation from artistic activity that may reasonably be considered to be income and who meets at least four of the following criteria:
(a) the artist has received public or peer recognition
(b) the artist's artistic activity has been presented to the public by means of exhibitions, publications, performances, readings, screenings or other means;
(c) the artist promotes or markets the artist's artistic work
(d) the artist has received training or acquired knowledge related to the artist's artistic activity
(e) the artist holds copyright in his or her artistic work and has received royalty or residual payments based on that copyright;
(f) the artist has a business licence issued by the municipality in which the artist is carrying on business related to the artist's artistic activity;
(g) the artist has membership in an artists’ association.
Canada Council for the Arts:
professional artist - An artist who:
After been asked numerous times about the business of art because it is different and can be difficult to connect in this life/business. After many years of trial and error, sometimes very good and sometimes very bad, I have found certain things to be true. I have learned that everyone's path to success is different because we are all wired so differently. Some teach. Others write. And still others create prints or license their work. I like to paint, to write, and to encourage art and artists so I exhibit, publish and have worked as an Art Program Coordinator in order to support other artists.
But in every part of my life as an artist, I have learned these valuable lessons:
1. Do the work of your heart & soul...unless you want to be in a business of manufacturing by creating things - whether it be sewing, painting, ceramics, dance...really anything creative - because you believe or someone told you that they may 'sell', you will become tired and frustrated very quickly. When you love what you do others will love it, too.
2. Do a lot of that work...create a series of pieces to not only build on your strengths but gives others the opportunity to know you. Series can mean different things to different people, whether that means utilizing the same materials, subject matter, colour palette, medium, substrate, etc.
3. Pricing can be the most challenging and I've been fortunate as I have received guidance from professionals but it is always good to research what others are doing. I have found that pricing per square inch, even though some pieces take longer than others or require more medium, helps me to keep everything sorted in my mind. Others price based their personal connection to the work but always keep in mind the cost of materials and time involved. I was also given wonderful advice from several successful Canadian artists some time ago...keep the small works reasonably priced as that way when your new patron can afford it, they will often invest in your larger works. Plus, it's a wonderful feeling to be able to share your work.
4. Utilize the knowledge & expertise of others in your field of interest if you can...but remember to trust your own instincts. You should always feel comfortable with your final decision. And keep in mind never to invest what you cannot afford to lose.
5. Business cards can be created quite inexpensively. I never used to realize how important they are but am asked for them almost every time I'm out and about...and even if I don't hear from that person in the near future (or ever) it amazes me how often I am contacted because someone else connected through that initial business card. Ideally, I think that they should be a reflection of you and your work, which should also be a reflection of you.
6. Initially I spent money, too much in my thinking without a lot of return, on things like a website or shows but then was given the opportunity to attend a three-month Government of Canada business workshop where I learned how to create my own website among other things. The biggest things I learned about web design was to keep it clean, no flashing lights, no dark colours, and have someone else proofread what I wrote. When the screen is cluttered or difficult to navigate or upload many viewers will not bother, plus not everyone's browser (computer) can view those special items or colours. Several years ago, I started on Blogger but then moved to Weebly years ago because I wanted a website and blog all together. Weebly is easy to navigate and free though I did purchase my domain name (www.veronicafunk.com) many years ago and still utilize it. You can pay to add additional items but I'm happy with what it offers as is. Be sure to include a way to contact you.
7. I used to send artist packages to galleries complete with portfolio (slides at the time) but now have everything (with a small portion of my portfolio) on my website. I also keep a Word document of my portfolio (photo, title, size, medium & date) in a binder. I have another binder for all the press I have collected through the years and a third for my gallery inventory. Because I never learned about any of this in college I found out through reading - my first great read was 'Taking the Leap' by Cay Lang about how to approach galleries. The biggest thing I learned was to make everything neat and tidy, to present myself and my work professionally as though it was a job application (which it really is), and to do research...visit galleries and see how my work would fit, see if the gallery wasn't representing someone who worked too similarly and to see how the space felt for me. Of the six galleries I had initially contacted, five called to arrange an interview.
8. A curriculum vitae (artist's resume) is really important to keep up...not only professionally but personally. It is really nice to be reminded of the things you've accomplished. And, believe me, unfortunately you do forget. This should include your education, exhibits, publications, awards, and any other professional employment. There are many examples that can be viewed on artist’s websites. Include an artist’s statement about the why and how of your work and a bibliography about you.
9. I haven't spent money on anything besides my supplies and business cards in years. The galleries I deal with advertise and along with my free website and Instagram; I send out enewsletters
through MailChimp. Because I was being asked so often what I was doing I decided to send out newsletters to share my excitement.
10. Finally, I have made it a habit to send hand-written 'Thank You' notes whenever I can. If not for those who support what I do, I couldn't do it as big, as often, and as long as I have. I am positively grateful.
Whether I blog, write articles or newsletters, I try to remember to speak in my own voice, to be authentic. I want to stay true to who I am and don't want anyone ever to feel obligated to support my work. I want what I create to live in a home or business with someone who loves it as much as I do. It makes me feel glad and honoured when others respond to this work of my heart. I like knowing that my work lives 'out there'.
Notes to Self.
Lighting.
Throughout the years I have tried all sorts of lighting solutions from up lighting (a floor lamp) to neck lights and track lights. One of the things I invested in many years ago was an OTT light. It casts nice clean north inspired light, which is ideal for more accurate colours. My favourite, though, is still natural light and I tend to move around until I can find it. It doesn’t matter which direction it’s coming from (north, west, east, south) as long as it is indirect. For photographs I occasionally use the OTT light when the skies are too grey – the top photo with my drafting table was taken in natural light, the photo above with my easel was taken using the OTT light.
In the summer I tend to move around and work where the light is best but in the winter I tend to remain in my studio, which can be a bit challenging at times as far as lighting. Currently I have a small set of track lights that I can adjust as needed, a gooseneck lamp attached to my drafting table, an OTT light that folds flat when not in use but is also very easily moved where required, a floor lamp that reflects light off the white ceiling and a table lamp. This combination seems to work well with the south facing window.
CREATIVE EXERCISES
“I don’t start with a color order,
but find the colors as I go.”
~Helen Frankenthaler
When I was in art college, we practiced a variety of interesting exercises to loosen up and use our entire bodies when we were creating and others to help us to see and draw better. I like to use them when I work with kids as they always have fun with it, but it is also good for me, not only to loosen up but also to trust myself a little more when I work...it also helps the old hand-eye coordination which is vital as an artist.
A few of the things I have been thinking of were terrific to stretch our creative muscles:
* work with your non-dominant hand
* create your image upside down
* use a limited or monochromatic palette
* work larger
* work smaller
* try a different subject matter
* try a different medium
* try a different ground
It's all about forcing our hands and eyes to work together and about pushing ourselves. Sometimes the most magical things happen by accident.
1. Draw Eggs
Our instructors often told us if we could draw an egg realistically, including all the values of highlights, shading, shadows, cast shadows and reflected light, then we could draw anything. It's really not as easy as it sounds.
2. BIG!
We would often tape 4 large sheets of newsprint together and, with charcoal or paint, we would crawl around the paper and using our whole arm & body we would draw or paint. Lots of eggs, but flowers, fabric and skeletons, too.
3. Left Hand
Or right if you are left-handed. This allows you to focus on the object you are drawing rather than on repeating patterns from your past. The piece above (yes, eggs) was painted with my non-dominant hand in gouache and is the only piece I have left from school (my final portfolio was stolen...which was actually a compliment).
4. Switch
If you work with other artists, sometimes it's a good idea to set up a still life and work for 10 minutes, then switch with your partner (or if more than one, move from piece to piece) for two reasons. The first is to gain a different perspective of the object to help you understand the form more fully and the second is that it forces you to work in a slightly different manner based on someone else's beginning.
5. Contour
There are two ways of performing contour drawing, one is by looking at an object and then only drawing its outline (contour) while being able to look at the paper...the second is blind contour, so no looking at the paper. In both cases do not lift your pen/pencil from the page. It's a great exercise to see how the form (positive space) interacts with the negative space around it.
6. Self-portrait
This is one form of creativity that has been practiced by artists throughout time. It's best to use a mirror and draw, paint, collage, etc. A great way to learn that everything is made up of shapes and how different shapes interact with one another as well as how much space there is between each shape.
7. Mirror Image
One of the neatest tricks I learned was to turn my work to a mirror. There is something about a new perspective that helps to see the problem areas. I find it works well with colour as well...to see those parts that aren't working cohesively.
8. Shade First
This one is interesting...shade in your image before adding the drawing lines. Certainly helps to push the boundaries a little more and forces you to pay attention how the shapes of your object sit in proportion to one another.
9. Don't Look
Look at an item intensely for fifteen minutes and then turn away from it to draw (or paint) it. When you're stuck close your eyes and envision it. It's interesting to see how much we can remember if we really pay attention.
10. Draw EVERY Day
It doesn't matter what you draw, the physical act of drawing is important. You'll improve your hand-eye coordination, your shapes, values, lines, proportion, perspective and composition...all the basic elements of design.
FINDING YOUR (ART) FAMILY
“Call it a clan, call it a network, call it a tribe, call it a family:
Whatever you call it, whoever you are, you need one.”
~ Margaret Mead & Jane Howard
Over the past few years I have been studying psychology as part of the Bachelor of Fine Arts program I have been working towards. It’s been wonderful to learn about the fact that people are resilient in spite of difficult circumstances, as long as we have someone who supports and encourages us. A book I read recently shared suggestions for building friendships, and the big takeaway for me was that in order to make a friend we have to be one. It means taking the initiative (slowly) and being vulnerable by sharing our thoughts and feelings with others. You connect with others being taking an interest in their lives and by sharing yours.
As an artist I have found that it can sometimes be difficult to connect when I spend too much time working in my studio instead of making connections and contributions in my community. I have a few extremely close, long-term friends which have come to include my husband and daughters but there are times that I need to remind myself to get out into the world.
When I moved to my community there weren’t other professional artists living here. This meant travelling to the nearest city to connect with art groups, take workshops and to be involved in art markets. It was a wonderful way to connect with other creatives and to share our trials and successes with one another. As my community has grown through the years, I have had many opportunities to volunteer in the arts and to secure paid positions. I also found out which areas worked better with my personality and skill set as well as which didn’t suit me as well. In every instance, I learned something and made new friends. Some were artists while others were supporters of the arts.
Finding your group is especially important for support and encouragement, accountability and insight. They are the guides and mentors that will be there for you when you need them, and vice versa. Through shared experiences, they can lift you up and help you feel connected. I have found these people, both in my immediate environment and also in my online community, to be the ones who also celebrate my successes with me, even those that might feel small or insignificant. These are also the people who help me overcome failures, or perceived failures, in order to move forward.
Sometimes it is valuable to share an idea or ask for assistance but I do suggest discernment in choosing those people that you invite into your inner sanctum. Occasionally, I myself have been guilty of this, meaningful comments can be interpreted as criticism which can inadvertently block the creative process. Though the intentions may be good, they aren’t always recognized in that vein. I’ve learned this through trial and error, and though I do know I will continue to err on occasion, I do hope that I am still learning.
CREATING AN ARTISTIC CAREER
Researching the definition of being a professional artist, I have found several definitions but I found the following two to be quite interesting:
ARTS Nova Scotia:
A professional artist is an artist who has received compensation from artistic activity that may reasonably be considered to be income and who meets at least four of the following criteria:
(a) the artist has received public or peer recognition
(b) the artist's artistic activity has been presented to the public by means of exhibitions, publications, performances, readings, screenings or other means;
(c) the artist promotes or markets the artist's artistic work
(d) the artist has received training or acquired knowledge related to the artist's artistic activity
(e) the artist holds copyright in his or her artistic work and has received royalty or residual payments based on that copyright;
(f) the artist has a business licence issued by the municipality in which the artist is carrying on business related to the artist's artistic activity;
(g) the artist has membership in an artists’ association.
Canada Council for the Arts:
professional artist - An artist who:
- has specialized training in the artistic field (not necessarily in academic institutions)
- is recognized as a professional by his or her peers (artists working in the same artistic tradition)
- is committed to devoting more time to artistic activity, if possible, financially
- has a history of public presentation or publication.
After been asked numerous times about the business of art because it is different and can be difficult to connect in this life/business. After many years of trial and error, sometimes very good and sometimes very bad, I have found certain things to be true. I have learned that everyone's path to success is different because we are all wired so differently. Some teach. Others write. And still others create prints or license their work. I like to paint, to write, and to encourage art and artists so I exhibit, publish and have worked as an Art Program Coordinator in order to support other artists.
But in every part of my life as an artist, I have learned these valuable lessons:
1. Do the work of your heart & soul...unless you want to be in a business of manufacturing by creating things - whether it be sewing, painting, ceramics, dance...really anything creative - because you believe or someone told you that they may 'sell', you will become tired and frustrated very quickly. When you love what you do others will love it, too.
2. Do a lot of that work...create a series of pieces to not only build on your strengths but gives others the opportunity to know you. Series can mean different things to different people, whether that means utilizing the same materials, subject matter, colour palette, medium, substrate, etc.
3. Pricing can be the most challenging and I've been fortunate as I have received guidance from professionals but it is always good to research what others are doing. I have found that pricing per square inch, even though some pieces take longer than others or require more medium, helps me to keep everything sorted in my mind. Others price based their personal connection to the work but always keep in mind the cost of materials and time involved. I was also given wonderful advice from several successful Canadian artists some time ago...keep the small works reasonably priced as that way when your new patron can afford it, they will often invest in your larger works. Plus, it's a wonderful feeling to be able to share your work.
4. Utilize the knowledge & expertise of others in your field of interest if you can...but remember to trust your own instincts. You should always feel comfortable with your final decision. And keep in mind never to invest what you cannot afford to lose.
5. Business cards can be created quite inexpensively. I never used to realize how important they are but am asked for them almost every time I'm out and about...and even if I don't hear from that person in the near future (or ever) it amazes me how often I am contacted because someone else connected through that initial business card. Ideally, I think that they should be a reflection of you and your work, which should also be a reflection of you.
6. Initially I spent money, too much in my thinking without a lot of return, on things like a website or shows but then was given the opportunity to attend a three-month Government of Canada business workshop where I learned how to create my own website among other things. The biggest things I learned about web design was to keep it clean, no flashing lights, no dark colours, and have someone else proofread what I wrote. When the screen is cluttered or difficult to navigate or upload many viewers will not bother, plus not everyone's browser (computer) can view those special items or colours. Several years ago, I started on Blogger but then moved to Weebly years ago because I wanted a website and blog all together. Weebly is easy to navigate and free though I did purchase my domain name (www.veronicafunk.com) many years ago and still utilize it. You can pay to add additional items but I'm happy with what it offers as is. Be sure to include a way to contact you.
7. I used to send artist packages to galleries complete with portfolio (slides at the time) but now have everything (with a small portion of my portfolio) on my website. I also keep a Word document of my portfolio (photo, title, size, medium & date) in a binder. I have another binder for all the press I have collected through the years and a third for my gallery inventory. Because I never learned about any of this in college I found out through reading - my first great read was 'Taking the Leap' by Cay Lang about how to approach galleries. The biggest thing I learned was to make everything neat and tidy, to present myself and my work professionally as though it was a job application (which it really is), and to do research...visit galleries and see how my work would fit, see if the gallery wasn't representing someone who worked too similarly and to see how the space felt for me. Of the six galleries I had initially contacted, five called to arrange an interview.
8. A curriculum vitae (artist's resume) is really important to keep up...not only professionally but personally. It is really nice to be reminded of the things you've accomplished. And, believe me, unfortunately you do forget. This should include your education, exhibits, publications, awards, and any other professional employment. There are many examples that can be viewed on artist’s websites. Include an artist’s statement about the why and how of your work and a bibliography about you.
9. I haven't spent money on anything besides my supplies and business cards in years. The galleries I deal with advertise and along with my free website and Instagram; I send out enewsletters
through MailChimp. Because I was being asked so often what I was doing I decided to send out newsletters to share my excitement.
10. Finally, I have made it a habit to send hand-written 'Thank You' notes whenever I can. If not for those who support what I do, I couldn't do it as big, as often, and as long as I have. I am positively grateful.
Whether I blog, write articles or newsletters, I try to remember to speak in my own voice, to be authentic. I want to stay true to who I am and don't want anyone ever to feel obligated to support my work. I want what I create to live in a home or business with someone who loves it as much as I do. It makes me feel glad and honoured when others respond to this work of my heart. I like knowing that my work lives 'out there'.
Notes to Self.
- You cannot & will not please everyone. That is a fact of life.
- By taking care of your own needs, you will sometimes disappoint or even anger other people.
- How other people react to your choice is not your responsibility.
- The greatest responsibility you have is to your own well-being & happiness.
DOCUMENTING & PRICING ARTWORK
Documenting my artwork may be one of the most challenging aspects that I experience of being a painter. After completing the work, taking photographs, listing it on an excel worksheet complete with date completed, media, and size I have to decide on its price, which is the second biggest challenge for me. When I was beginning to exhibit work in galleries, I was fortunate to connect with Directors who guided me in the price of each piece. They considered the media, size, length of time taken to produce the work, my experience and comparisons to other artists in the region who was on a similar path.
Throughout the years I have been told that my work is too much like graphic design or not enough, which puts me in a bit of a different place than many other artists whose work falls in a specific category, such as traditional, landscape, abstract, and so on. But there are definitely other artists whose work and experience is similar, so that can always be a great starting point in gauging pricing. I prefer pricing by size (per square inch) which works well with the galleries. They have also been wonderful in raising my prices when demand went up as that is something with which I have definitely struggled. My goal is that my work be accessible as I believe everyone deserves original art in their homes and offices. Some artists price based on a calculation that includes time, cost of materials, and also considers commissions (which is often around 50%).
A big part of documenting my artwork includes photography and creating a spreadsheet on excel. This portion could be done in a notebook, but I do find that being able to re-order the work in a spreadsheet is nice (for example, by date, by title, by series). I have received help in utilizing the software. I also keep records in binders – they include articles, gallery inventory and portfolio.
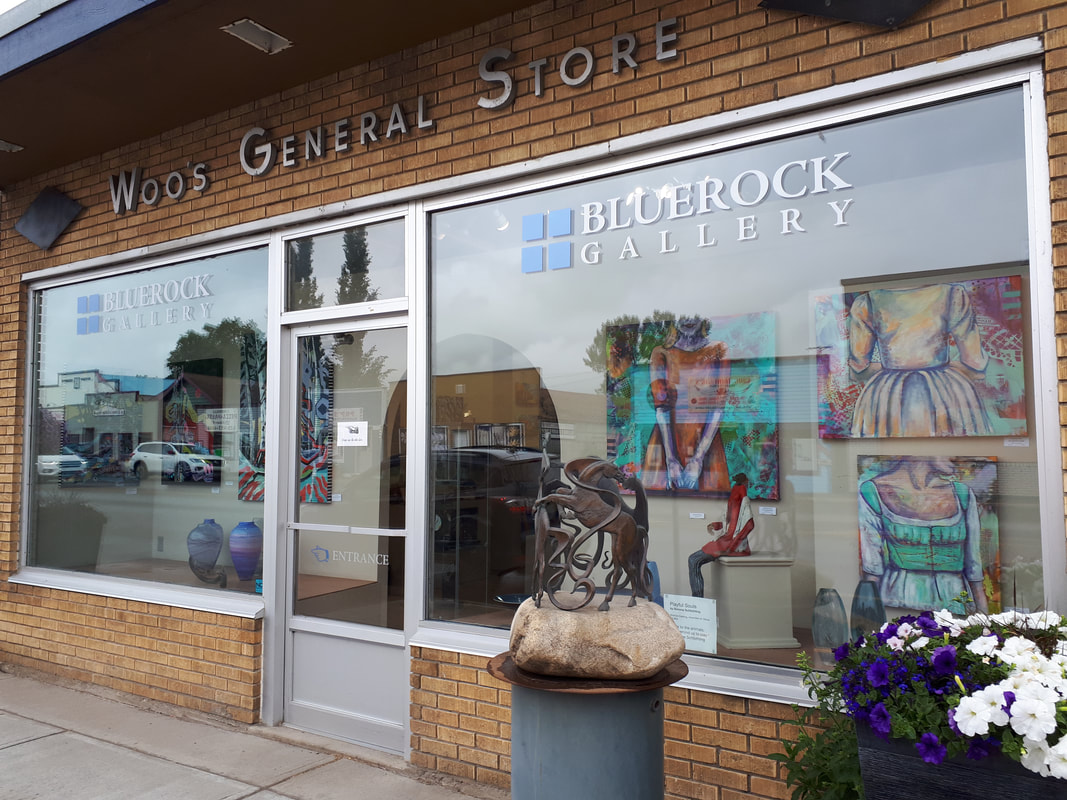
Photographing artwork.
When I first began documenting my work in photographs before the digital era, I used a Minolta SLR and tripod with a backdrop and proper photo lighting and took a ton of photos all the while adjusting the lighting, tripod and settings on my camera. I never knew how they would turn out until they were developed and at times, I would have to do it all over again or live with a slightly blurry photo if the painting had already sold.
Now, with digital media life is so much simpler. I began with an inexpensive point and shoot camera but have since moved up to a Canon EOS Rebel T3i but still use the same basic principles...lots of pictures in different settings...though I no longer use a backdrop and photo lights.
Natural lighting tends to capture the colours more faithfully than anything man-made that I could set up previously, plus it's so much simpler. At different times of the year and under different weather conditions I tend to move around. Man-made lighting tends to cast an orange or yellow or even blue hue on everything.
My south facing front yard near mature evergreen trees is ideal in spring and fall. My dining table has a west facing window and seems to work really well in winter. My north facing back deck is where I can capture great colour in summer, though I prefer a sunny day with me in sun and the painting in light shadow. Since our house is higher than any of our neighbors, I don't have to worry about shadows cast by any other buildings. Depending on cloud cover, rain or snow, my south facing living room floor works well. We have a large bay window and those large evergreens that filter light. And, finally, almost any time of year and under most weather conditions, my north facing kitchen tends to capture the colours best. In the room we have a west facing window that is shadowed a little by a roof and north facing French doors...the ideal light. It would be a perfect studio.
I will often move the piece around to photograph it under several different lighting conditions to see which shows the truest colour, which can sometimes be a challenge when the work measures 5 feet but it's always worth the effort. And from there I will do whatever it takes to get an accurate photo...crouch, lie down, stand on chairs or ladders...my neighbors are quite familiar with seeing me in unusual situations and chalk it up to living near an artist.
Then, I set my camera to its highest settings, center the image, and zoom in as much as possible so it won't require much cropping and will retain a high resolution (both pixels and dpi). I have taken a couple of photography courses to learn more about photography, but I tend to let the camera do most of the work and did read the manual in order to learn how to change the settings. I brace my elbows against my body, take a deep breath and hold it, then shoot the image. I often take photos both on the manual setting where I can focus the image and on automatic - I have to admit, the eyesight just isn't what it used to be and the camera's automatic settings are fantastic.
Finally, I install my camera card into my computer and open a (free) photo editing software to view and crop the images. Some of the free editing software I've used in the past are IrfanView, Gimp, Picasa, Picnik, and Pixlr though I haven't tried them all and there are many more. I personally don't edit anything but cropping or dpi and pixel size so I prefer to use something that isn't too challenging. Plus, I don't tend to spend too much time at my computer. Like everything, I always do suggest research.
When I'm taking other 'fun' photos for my blog, I still use natural light as much as possible and take them from many different angles and I've found that I can get some very interesting images this way.
Pricing work.
At the beginning of my art career, I struggled with pricing my artwork. Once I had created a body of work, I began preparing submission packages for galleries but wasn’t certain about the price point of my paintings. I began visiting galleries and attending gallery openings, speaking with artists and gallery directors and, over time, learned a bit about pricing.
Though I was fortunate to have a solo exhibit shortly after submitting packages and, with that, guidance from the gallery, I did learn a few things. The first is to go to a lot of exhibits, visit both solo and group shows, learn about artists, their media, style and length of time it takes to create a piece. Also, pay attention to where the artist is in their career. An emerging artist’s fees will typically be lower than a long-term professional, but that isn’t necessarily the case. It’s also nice to ask for feedback. Over pricing work can mean that it remains in your possession for a long time but under-pricing can make devalue it. Some artists charge more for work that takes longer, even if it is in the same media and size as previous work, but others find a formula works best…which is where I sit.
I dislike dealing with numbers so it has been nice to know that my paintings have a price point per square inch. Over the years my painting prices have quadrupled but on occasion, such as when I introduce a new body of work, the price point is sometimes lower in order to accommodate my learning process. It’s just something that I feel better about. There are also times when a gallery recommends a higher price point for a body of work as well. I trust their judgement as they know the market better than I do. Just like everything I do, there is always a lot of research involved.
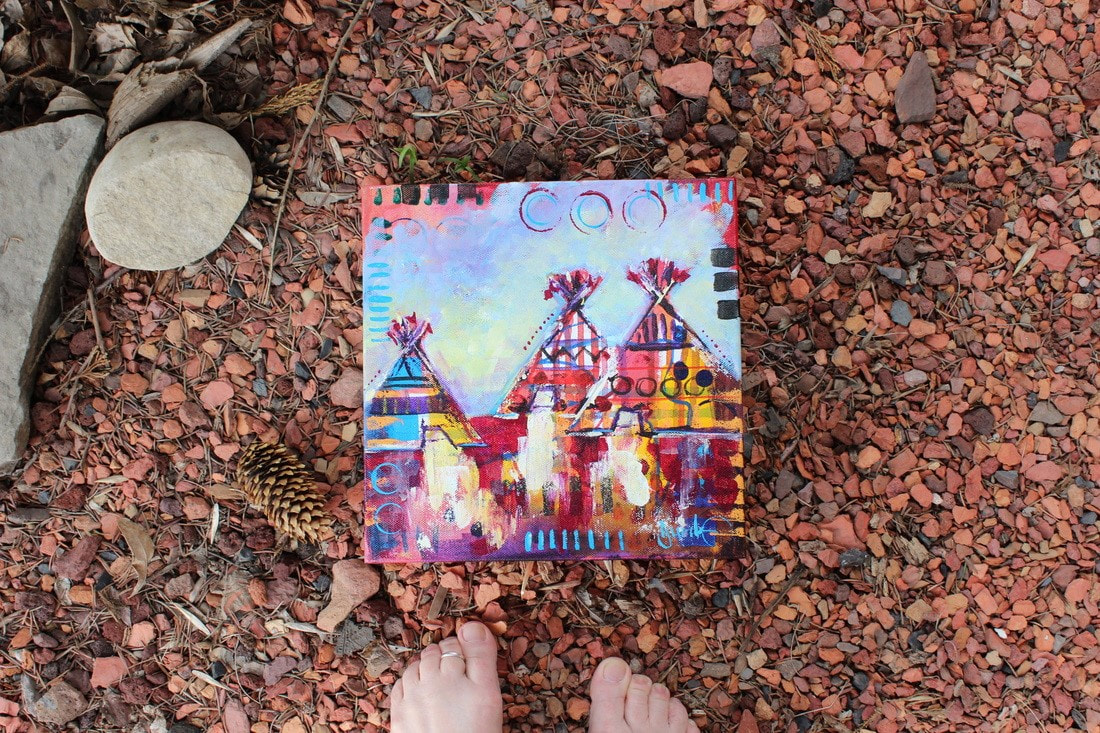
SOCIAL MEDIA & THE WEB
To be honest, I have had a little love/hate relationship with different social media platforms. Throughout my career I have received a lot of different advice on what I should do and how I should do it, but in the interest my sanity I finally figured out that having a website was the most important thing to me as it is my online portfolio. It also includes a blog, which I love to add to fairly regularly.
Other platforms have been a bit more challenging. I’ve tried several but found that if they felt at all negative to me, I was affected both personally and creatively. Currently I really enjoy Instagram because it is very visual which totally suits me.
As far as what to post, the best advice I received was to post whatever, whenever and however I want. I love that. It’s fun to share my process and the things I am privileged to contribute to as I tend to look back throughout the year to see what I have actually accomplished. Unfortunately, it’s something I often forget. It also helps me to remember to update my Curriculum Vitae a little more regularly.
Whenever I need to submit proposals keeping visual track of what I’ve been doing also helps me to craft a better proposal. Because I am a visual person, pictures help to trigger my memory and the way Instagram is set up works for me. Seeing all those little squares and how they interact with each other gets my creative juices flowing and once I click into images, the words help me to make valuable connections that usually translate well to my writing.
Also, I find the accountability to be fantastic! Whenever I’m creating on a body of work and haven’t been updating my process, I do get little messages of encouragement or even of concern. It’s good for me to have people checking up on occasion.
I think it’s very important to use your own voice in order to share your personal story. Others will connect to what you share and how you share it. That has certainly been true in my experience.
Instagram.
I want to focus on the two media that I find work well for me and are quite important, one of them being Instagram. Because I am a visual person, this platform suits me quite well. I only take a few minutes a day to post something and see what other artists and friends are up to. I think one of the main reasons this works well for me is the fact that I can take photos or small videos with my phone while I’m working which then can be added to either my feed or my online stories. I also like to take notes on my phone or in a small moleskine sketchbook whenever something comes to mind, which I can expand on in Instagram or on my website.
Even when a post doesn’t necessarily receive a lot of engagement in the form of likes or comments, the work in progress or completed pieces often end up finding a new home, which is a wonderful thing. Often, I will hear from an artist after a year or even several years of following my work online and it’s a great feeling to be able to connect with others. I know personally that it can take me a long time before I reach out to someone, even though I admire their work, their process and/or their philosophy on life or the creative experience.
Blogging.
I've been asked numerous questions about my experience with blogging, so I wanted to share some of my thoughts here. Blogging is very personal, I think, and after almost two years of a friend's recommendations I began blogging myself and have enjoyed every moment of it. My physical journal is written and/or sketched in daily so this really is just an extension of that practice. Unfortunately, my original blog which was started years ago disappeared into the stratosphere, I don't regret anything about it, even losing it entirely. I've come to appreciate the fact that there is a time for everything.
Because of blogging, I have met amazing people and had the most incredible opportunities. My first foray into collaboration happened because of my blog...you can view the results of a year-long labour of love at http://innerworkscollaborative.blogspot.ca.
What I like about blogging is that it's basically a website but not so static. I occasionally write for other blogs as well. Just because it's fun and it really is a pleasure to connect with others. Here are the 'steps' that I have followed in my blogging journey:
1. Research. Just like anything I do, research is key. Fortunately, I love researching everything so this is a natural progression for me. I took notice of what I liked and didn't particularly care for on other blogs and found that I loved things to be clean and simple. And, being a visual person, I gravitate towards anything with a pretty picture.
2. Decide what you'd like to share. Photos? Videos? Writing? Updates? Work-in-progress? Recipes? What is it that interests you? What inspires your work/life? What are you involved in? My personal choice is to share books, quotes & poems (love literature), work-in-progress, and because I've often been chastised (in a good way) for not sharing what I'm involved in, such as exhibits or arts in my community, I'm also sharing more of my daily life as an artist.
3. Find a platform you like...first of all, free was key for me as I had decided many years ago that my art supplies are expensive enough, I really don't want to pay for anything on top of that (well, within reason of course). And I wanted it to be user friendly (translation - "easy"). There are so many different blogging platforms, and my current platform Weebly.
4. Decide how much personal information you'd like to share online. I've found blogs that share every emotion throughout every day to be exhausting. Also, because I have a family history of clinical depression, I try to make a point of having as many positive experiences in my day as possible so I tend to gravitate towards those blogs that share happy thoughts, beautiful photographs (even of the most mundane daily things) and interesting tips. But it really is up to you. I also keep my family a little more to myself because, let’s face it, not everyone agrees that my children are the most beautiful and perfect beings on the planet (VDH?!? - acronym for my German relatives' "Vat da heck").
5. Speak in your own voice. A few years ago, I took a number of writing classes just to improve my written communication, especially in my work as I write statements and articles for publication. The best thing I learned was freefall writing...just start writing and don't worry about editing for grammar and punctuation until you're done. I never plan my blog posts; I just sit down and write whatever it is that I feel like sharing at that moment. I've had some of the greatest experiences when I met people who connected with me through my blog and said that I was exactly the same in person as online. A huge compliment (I hope!).
6. Take lots of photos...if that's what you chose to add to your blog as they are great fodder for blog posts. People do tend to love seeing the process of work, the materials used, the space where it is created and the artist who is creating it. I know I do.
7. Decide on the frequency of blog posts. Some blog once a month, others daily, and others whenever they have something they'd like to share. I typically blog during the week, leaving my weekends for my family but I don't always follow that structure. I really want to enjoy this experience so if I'm not well or tired or especially busy, I let it go until I'm ready to blog again. You never need to apologize for not blogging when you choose to blog again.
8. Remember that everyone has something interesting to share. Honestly, if you love it, someone else will love it, too. It's a real pleasure to connect with like-minded souls.
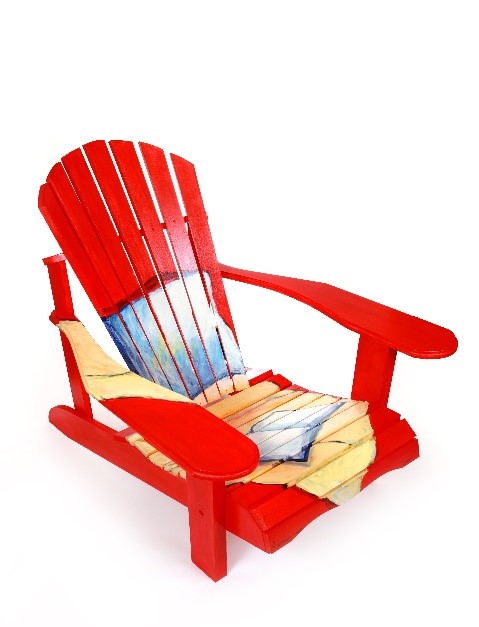
RESEARCHING & SUBMITTING PROPOSALS
I'm often asked how I can share my work publicly, whether online, as public art, as exhibits, in magazines or via sales. It hasn't always been easy. There is always the fear of rejection when submitting proposals, and once they're accepted, rejection from the general public. Especially since a good year or two of hard work goes into the creation of a body of paintings - a lot of life and emotion is committed to the canvas. But I love to paint, I have tried not to do it but it was to my detriment, and so I paint a lot. I can only store so much work in my house before I become claustrophobic (anyone who knows me knows how anal I am about too much stuff - even stuff I love).
Plus, I dreamt about being a professional artist for as long as I can remember. Not about the exhibiting part but about the making part. I was an extremely introverted child and found my joy in creation. And it excites me when others fall in love with my work, too. Thankfully I keep creating whether or not I have an exhibit ahead of me, but it certainly is easier to stay focused and committed when I have things to work towards.
On occasion I have been afraid of the judgement, of being accused of replicating someone else's work or of being a terrible artist. But I've found that it really doesn't matter what I do, as long as it comes from a deep part of myself, from my own experiences and using the skills I have developed over time. In the past I took critiques from other artists or gallerists too personally, believing that they knew better than I and yet as I keep working how I feel led to work, things get better and I feel the most connected to what I do.
Learning to let go and allow others to connect to my work however they do is a wonderful thing. I know that my form of expression won't always be understood by others but I also know that that's okay. And, in spite of my fears, the most rewarding part of exhibiting and sharing my work is the positive feedback I receive. And, boy, when my work finds a new home that is the most incredible feeling. It's definitely worth overcoming the fear and taking that leap of faith.
Research.
Often, I have been approached and asked whether I would like to be involved in something. Word of mouth is still a valuable way of receiving information but there are many ways to learn about opportunities. Searching online can offer a multitude of opportunities and so can being part of an arts group. Many government organizations (municipal, provincial, and national) also offer links to possible residencies, grants, public projects and more. Galleries, art publications, and other artists are also valuable resources.
Many galleries and art groups have submissions pages on their websites. These pages share specific information regarding the request and how to submit. Most gallerists prefer that artists not contact them directly at the gallery as they are running businesses and do receive many requests.
Submissions.
Most calls for submission, whether that be in gallery or public spaces, or for teaching or speaking opportunities, often have very specific requirements. They typically list the media, subject matter, size of file to exhibit, and how they want to receive submissions. Often this means editing photographs and re-labelling them to those specifications.
There will be deadlines listed along with the dates that artists will be notified as to their final selection. Just keep in mind that a rejection is not necessarily due to the work, but instead due to the specific vision they had for the exhibit. I have also found that a rejection in one venue leaves me open to other opportunities that I may not have been aware of previously. My first solo exhibit took place in a large venue with television, champagne, and chocolates along with over 250 patrons in attendance…it was absolutely lovely but also fell on the heels of a few rejections.
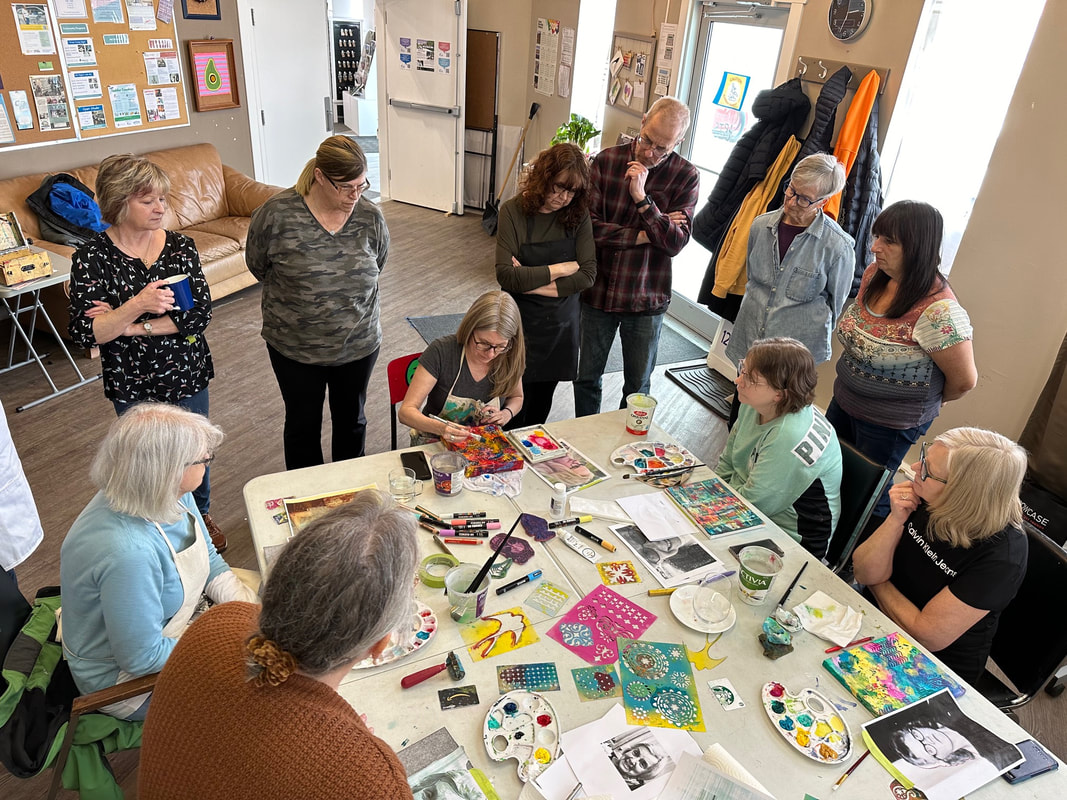
EXHIBITING WORK
Throughout the years I have had the opportunity to exhibit my work in many different spaces. From public and private galleries to cafes, hospitals and other public spaces, to markets and other events. Whether or not I sold any work at any of these spaces wasn’t an issue, as the exposure did make a difference long-term.
Eventually I found that certain environments, such as markets, totally depleted me. I am an introvert by nature so I need a lot of time alone in order to recuperate from group settings. Besides galleries, some of my favourite settings are public spaces. It is wonderful to see how my work exists in a typical environment and always surprising how many pieces sell because of it.
Just like everything I do, I have learned to try things out and then decide if it works for me. One thing that I believe is important, though, is not to invest any finances in anything that I wasn’t prepared to lose. The return on investment isn’t necessarily immediate or guaranteed.
I also really love being represented by galleries. The relationship is reciprocal, meaning that there is respect from both parties, and both support each other by supporting one another, which may mean links on websites and sharing on social media.
When I have been invited to exhibit my work in a gallery or public space, I try to set up a meeting to view the facility in order to draw out a floor plan and take measurements. If that isn’t possible, I will ask for a layout along with measurements and photographs of the space if possible. I think breathing space between each painting is important but I also don’t want to be short of artwork so I tend to bring a few more pieces than required and make a final decision in the space. I love showing my work in public spaces and have been pleasantly surprised at the number of paintings that have sold because of those opportunities. Some of my favourite places to exhibit have been cafes, hospitals, theatres, libraries and health clinics.
A few of the questions I ask before accepting an invitation are:
Typically, when I create a series of work, I like to show it as a complete body either in a gallery or other public space such as a library or health facility. I try to think of where the work would exhibit well, and even consider showing with another artist or in conjunction with other similar artwork (ie. fashion paintings at a fashion show). This often requires some research and discussion with family, friends or other artists. I typically create the work and figure out what to do with it after the fact but, on occasion, as I tend to post what I’m working on regularly, I am often contacted directly about either a solo or collaborative show. One of the strengths of social media.
Hanging art.
I have had several friends who were directors at art galleries or interior designers and they shared many tips for hanging art with me. I have also been in several homes or businesses where I've seen prints or paintings (or calendars) hung near the ceiling...it wasn't pretty. And because I was recently interviewed on how to hang art, I decided I should share what I've learned here, too.
Most of these 'rules' can be broken (which I do regularly) but they are a good guideline. Because I'm 5'2" (62"), I use myself as a guide but because my husband is 6 feet tall, I will also hang work a bit higher on occasion. I also don't keep it to artwork or prints, I also include pottery (often find suitable hangers for three dimensional items at craft, hobby or hardware stores), memorabilia and at times interesting framed fabric or scrapbooking paper.
1. Typically, pieces should be hung so that the vertical center of the painting is at approximately 60 inches from the floor. For example, if I hang a painting that measures 30x40 inches, with 30 inches being the height, I would make sure that the 60-inch mark on the wall would hit the halfway or 15-inch (30 divided by 2) mark on the painting. Recently my work, all in different sizes, was hung with the tops of each piece at the same height which is a contemporary manner of displaying artwork and was very pleasing to the eye.
2. When hanging work in a place where you typically sit rather than stand, such as a dining room, the paintings can be hung slightly lower to incorporate the fact that the viewer's sight line will most likely be lower.
3. If you are hanging work over furniture, such as the back of a sofa or a hall table, a good guide is to hang the work anywhere from 6 to 10 inches above the piece. This gives the furniture and the artwork a visual connection.
4. When creating a grouping of smaller pieces, initially I like to place them on the floor in a pleasing combination as they should be treated as one large piece, so that the center of the group of art will sit at 60 inches on the wall. Groupings do not need to match, the style of work or frames (or frameless) pieces can all work together well if they all appeal to you.
5. Finally, if you have a piece that tends to tilt, try using a piece of sticky tac or washi tape which shouldn’t mark walls on the bottom right corner. I find it works every time. Masking tape is also good to use to mark the 60-inch point on the wall or the place you want to hang your hook, instead of marking with a pencil.
Throughout the years I have had the opportunity to exhibit my work in many different spaces. From public and private galleries to cafes, hospitals and other public spaces, to markets and other events. Whether or not I sold any work at any of these spaces wasn’t an issue, as the exposure did make a difference long-term.
Eventually I found that certain environments, such as markets, totally depleted me. I am an introvert by nature so I need a lot of time alone in order to recuperate from group settings. Besides galleries, some of my favourite settings are public spaces. It is wonderful to see how my work exists in a typical environment and always surprising how many pieces sell because of it.
Just like everything I do, I have learned to try things out and then decide if it works for me. One thing that I believe is important, though, is not to invest any finances in anything that I wasn’t prepared to lose. The return on investment isn’t necessarily immediate or guaranteed.
I also really love being represented by galleries. The relationship is reciprocal, meaning that there is respect from both parties, and both support each other by supporting one another, which may mean links on websites and sharing on social media.
When I have been invited to exhibit my work in a gallery or public space, I try to set up a meeting to view the facility in order to draw out a floor plan and take measurements. If that isn’t possible, I will ask for a layout along with measurements and photographs of the space if possible. I think breathing space between each painting is important but I also don’t want to be short of artwork so I tend to bring a few more pieces than required and make a final decision in the space. I love showing my work in public spaces and have been pleasantly surprised at the number of paintings that have sold because of those opportunities. Some of my favourite places to exhibit have been cafes, hospitals, theatres, libraries and health clinics.
A few of the questions I ask before accepting an invitation are:
- Who will hang the work?
- If I am hanging it, will supplies such as hooks, measuring tape, a hammer and a level be provided?
- How long will the work be exhibited in the space?
- Do I need to provide business cards and/or a framed statement about the body of work?
- How will requests for information or sales be handled?
Typically, when I create a series of work, I like to show it as a complete body either in a gallery or other public space such as a library or health facility. I try to think of where the work would exhibit well, and even consider showing with another artist or in conjunction with other similar artwork (ie. fashion paintings at a fashion show). This often requires some research and discussion with family, friends or other artists. I typically create the work and figure out what to do with it after the fact but, on occasion, as I tend to post what I’m working on regularly, I am often contacted directly about either a solo or collaborative show. One of the strengths of social media.
Hanging art.
I have had several friends who were directors at art galleries or interior designers and they shared many tips for hanging art with me. I have also been in several homes or businesses where I've seen prints or paintings (or calendars) hung near the ceiling...it wasn't pretty. And because I was recently interviewed on how to hang art, I decided I should share what I've learned here, too.
Most of these 'rules' can be broken (which I do regularly) but they are a good guideline. Because I'm 5'2" (62"), I use myself as a guide but because my husband is 6 feet tall, I will also hang work a bit higher on occasion. I also don't keep it to artwork or prints, I also include pottery (often find suitable hangers for three dimensional items at craft, hobby or hardware stores), memorabilia and at times interesting framed fabric or scrapbooking paper.
1. Typically, pieces should be hung so that the vertical center of the painting is at approximately 60 inches from the floor. For example, if I hang a painting that measures 30x40 inches, with 30 inches being the height, I would make sure that the 60-inch mark on the wall would hit the halfway or 15-inch (30 divided by 2) mark on the painting. Recently my work, all in different sizes, was hung with the tops of each piece at the same height which is a contemporary manner of displaying artwork and was very pleasing to the eye.
2. When hanging work in a place where you typically sit rather than stand, such as a dining room, the paintings can be hung slightly lower to incorporate the fact that the viewer's sight line will most likely be lower.
3. If you are hanging work over furniture, such as the back of a sofa or a hall table, a good guide is to hang the work anywhere from 6 to 10 inches above the piece. This gives the furniture and the artwork a visual connection.
4. When creating a grouping of smaller pieces, initially I like to place them on the floor in a pleasing combination as they should be treated as one large piece, so that the center of the group of art will sit at 60 inches on the wall. Groupings do not need to match, the style of work or frames (or frameless) pieces can all work together well if they all appeal to you.
5. Finally, if you have a piece that tends to tilt, try using a piece of sticky tac or washi tape which shouldn’t mark walls on the bottom right corner. I find it works every time. Masking tape is also good to use to mark the 60-inch point on the wall or the place you want to hang your hook, instead of marking with a pencil.
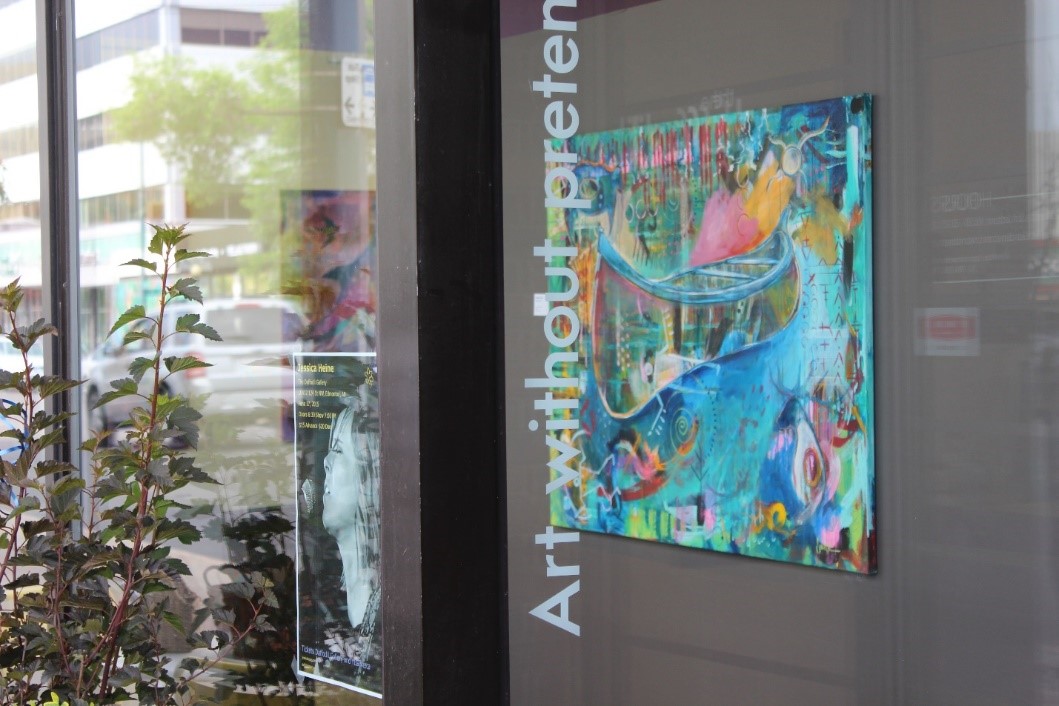
CONNECTING WITH GALLERIES
One of my biggest struggles, both early on in my career and every time a gallery closes or moves, is connecting with the right galleries. In the beginning I was happy to be represented by any gallery that was interested in my work but over time learned that a healthy reciprocal relationship between a gallery and an artist is paramount.
At one time, my work was represented in galleries across the country. On occasion, I didn’t receive payment for work that was sold or went missing. Other times my work was returned damaged or not returned at all. There was the odd gallery that didn’t actually hang the work, only filling their storage shelves with it instead while at the same time not allowing the artists to show their work elsewhere in their cities. Thankfully, that hasn’t been the bulk of my experience. Typically, the relationship between a gallery and an artist is a healthy one and when that happens, both experience success. I don’t know if there is a magic recipe for that relationship, but I have learned to do some research and to trust my instincts.
I used to feel that I needed to be represented by many galleries in order to feel like a professional artist, but these days I find that being represented by a few while continuing to share my work in public spaces works for me. In order to find places that are looking for artists, be sure to visit gallery websites and view their calls for art. Their websites are also great places to get to know the philosophy of the galleries and see if they are a good fit for yours.
In the beginning, I learned to create a body of work, usually around 20-25 larger pieces or 50-100 smaller works that had a similar theme, subject matter or media. Personally, I like to write and re-write my statement about the series as I work through it. I begin with an idea and jot down some notes about what inspired it and what influenced it. I love to research and also find that when something catches my attention, I see evidence of it everywhere. It tends to trigger memories which I like to clarify in writing.
When I started contacting galleries, I had to visit the spaces to view the style of work they represented as well as get a feeling about the space and the staff. Then, I photographed each piece outside which gave me the best light, using a black sheet as a backdrop (in those days there wasn’t digital media where you can crop your work) to take slides.
The first time I prepared artist’s packages, I ended up sending them to six galleries in my region. The packages included a letter of introduction, my curriculum vitae (art resume which was very small as I had only shown in a few local shops and cafes), a statement about the body of work, a set of slides and a return envelope. It took months but eventually I received my packages back. Five of the six galleries made appointments to view my work in person. In the end I had one amazing exhibit and though I wasn’t picked up to be represented permanently at that time, it gave me the confidence to do it again and again until I did get full representation.
It can still take months for a gallery to respond to a query, though it is much easier now. I highly recommend keeping a website that is up-to-date as there are so many free and easy to use platforms and it can be so much simpler now to send an email with a link to your website (make sure it is included in an email signature). I have found that many galleries are very busy and like to be able to watch what an artist is doing via social media and website for a while.
Like any other endeavour, whether that is to work elsewhere or to be an entrepreneur, connecting with a gallery is part of employment. It takes research and commitment to your work. And the research can be very fun, visiting galleries, taking in art exhibits and meeting with other artists.
Believe me, it’s still scary. It’s scary every single time. Not only is it like applying for any job, it’s also opening yourself up for a very personal critique. Criticism isn’t fun and it feels a bit like a double-edged sword when both your creative soul and your personality are being judged. But…saying that, it is also extremely rewarding. I’m sure you’ve heard of the number of times so many writers have been rejected, like J.K. Rowling, but they didn’t give up. I have received many, many rejections, but often they have been followed by something pretty amazing. Sometimes it feels a bit like a redirection so that I can be available for whatever I’m supposed to be involved in. It definitely feels much better when I think of it that way.
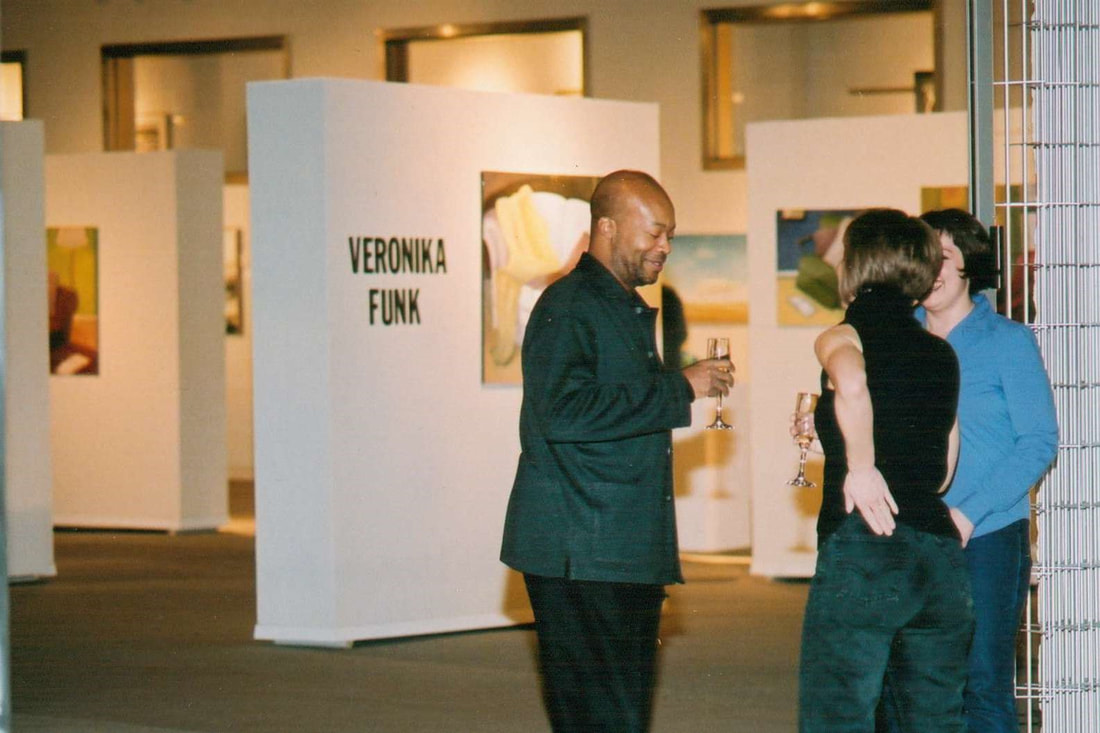
Rejection.
Rejection is difficult, but it is also the nature of this career path. Recently on the heels of receiving two rejections to take part in group exhibits, two large paintings sold through different galleries and I was interviewed by a television producer. It’s funny how often that happens. The old adage of a closing door and an opening window rings true so many times.
There are some artists and authors who like to keep rejection letters in order to fire them up and motivate them to work harder but I find that the sooner I get rid of them, the better I feel. I find it difficult to re-read anything negative and so I know that in order to focus and move forward, I need to remove them as soon as possible. In the past I have tried to keep a record of where and when I’ve submitted work and the responses I have received, but I do find that to be rather deflating so I stopped doing that some time ago. It may seem counterintuitive, especially with my business management background, but it works for me.
SUGGESTED READING
“Literature is the most agreeable way of ignoring life.”
~ Fernando Pessoa
I am a voracious reader and will read almost anything. My husband once told me that a police investigation might turn up an unusual reading list which may be rather confusing…I’m okay with that. Some of the books I choose to read are purely for information such as technical or professional advice while others have been the impetus for a new body of work, regardless of whether it is fiction or non-fiction.
My go-to list.
The Sacred Vessel: A Painter’s Handbook by Me J
When I was starting out, I was very fortunate to receive guidance from a number of successful artists and gallery directors. I decided to create a handbook to share the things that I learned, some through trial and error, including the most basic things such as stretching or wiring a canvas to connecting with galleries. The book is available through Alberta libraries or for purchase online at https://www.blurb.ca/b/6976364-sacred-vessel-a-painter-s-handbook
Taking a Leap: Building a Career as a Visual Artist by Cay Lang
I read this book before home computers, digital technology and the internet which meant I had to create artist's packages that included slides, resume, statement and all with a stamped return envelope if I wanted the slides returned. And let me tell you, slides were not inexpensive or that easy to get, so I definitely wanted them back. It was invaluable to guide me on researching galleries (which meant visiting them) and how to submit professionally. It's now been re-written to include our digital era and I'm guessing it's even better. I lent my copy out a number of years ago and haven't seen it since but it was invaluable to my initial introduction to exhibiting my work.
The Artist's Way by Julia Cameron
I'm sure most creative people have read this book and for good reason. Probably the best habit I developed because of this is to write daily, whether that is on my blog or in my journal. This leads to painting or drawing every day, too. Creativity begets creativity.
Writing Down the Bones: Freeing the Writer Within by Natalie Goldberg
This is actually a writer's workshop in a book. Because I spend so much time in solitude as a painter, I found that this book applied to the process of painting as much as it does to the process of writing. Plus it also helped build my confidence in writing.
The Creative Habit by Twyla Tharp
Twyla Tharp is a dance choreographer and this book is absolutely wonderful. It's written as exercises and is absolutely enlightening. It's wonderful to read about how she is inspired, how she gets out of ruts, and creating a body of work, some of my favorite things about any creative soul.
Steal Like an Artist & Show Your Work by Austin Kleon
After many years and many books, these little gems encapsulate everything I've learned as an artist. He really teaches that we just need to show up as ourselves. Everything I’ve read by him is brilliant!
How to Survive and Prosper as an Artist by Caroll Michels
Much like 'Taking a Leap', this book breaks down the business of art including the legal aspect. I did enjoy it.
Art & Fear by David Bayles & Ted Orland
I love the simplicity of this one...on how and why we approach our art (or avoid it) and why it can be so very difficult. Many years ago I became a painter just because I can't not. Doing the work is the easiest part for me, even if I feel it may not be good enough, I enjoy the process (believe me, there is a lot of work I have created that hasn't been shared publicly). But there are those times I feel immobilized by fear...whether that is in the creation of or sharing my work. It's not a good place to be and I find that I just need to push past that feeling and all is good.
The Art Spirit by Robert Henri
This is one of two art books I have kept from college...my copy is falling apart so I've ordered a new one. It's filled with wonderful notes on both art and life. It is an easy-to-read guide that you can pick up and open to any part for creative inspiration and education.
Drawing on the Right Side of the Brain by Betty Edwards
This is another book that I've had since college, though I did have to purchase another edition as mine fell apart. It is a step-by-step guide to improving drawing skills and is basically how I was taught in high school. Another fabulous book.
About trusting yourself.
Big Magic by Elizabeth Gilbert
I found this book to be a quick and inspirational read. It was really about living a creative life unapologetically. Not only does she discuss where and how we find inspiration, but does so with so much wit and humour.
The Gifts of Imperfection by Brene Brown
While Brene Brown was studying for her Master’s Degree I had the privilege of communicating with her on occasion through blogging. What I enjoyed about her most was seeing her struggle with her own self-consciousness and allowing herself to be vulnerable…which is a scary thing to do. The best part of the online world is that we get to see others struggle in similar ways that we do and that there really is no such thing as perfection.
Let the Elephants Run by David Usher
This book is very pretty and extremely inspiring…both things that I really appreciate as an artist. I love the idea that David Usher believes in a combination of freedom and structure. That’s totally how I work.
How to Be Yourself by Ellen Hendricksen
For the past few years, I have been studying psychology and, though I think we all know this, being yourself means accepting who you are, identifying any negative self talk, celebrating your strengths, expressing yourself in a way that feels right for you, and being vulnerable…with the right people. This book was enlightening in that Dr. Hendriksen deals with social anxiety (including her own) with gentle humour.
Boundaries by Drs. Cloud & Townsend
I think boundary setting might be one of my greatest challenges. It’s taken me many years to understand that a ‘no’ from me doesn’t mean rejection for someone else and that saying ‘yes’ to something that my heart isn’t connected to means that someone else, who might be perfect for that role or position may be robbed of a wonderful opportunity. Learning to trust myself has been game changing for me.
When by Daniel Pink
Daniel Pink is often full of wisdom but I found this book to be especially interesting as he talks about the idea that when a person does something is almost more important than what they do. It’s all about perfect timing leading to success, which can include beginnings, such as the beginning of a year, month or week. He also discusses the fact that we all have stronger times of the day and weaker ones, something I learned about myself years ago (I always lag in the early afternoon, which is apparently common). The biggest insight for me was paying attention to when I might make better decisions.
For fun.
Because I often feel a lull in my creative spirit after a time of hard work, I usually visit the library stacks in search of inspiration. I wish these books would have been available years ago, when I felt really stuck and though I was playing and experimenting, I felt a little lost for a while. I don't necessarily read these books cover-to-cover but the images, words, and sometimes a technique or two are enough to get those creative juices going...
In Pursuit of Inspiration by Rae Dunn
Not only is this pretty and a quick read (and re-read), she shares her story of creativity as a potter. It includes a little history, a little inspiration and is chock full of yummy sketches and photographs.
Cultivating Your Creative Life by Alena Hennessy
What I particularly love about this book is the artist's focus on watermedia...particularly watercolour...and on contemplation. I was labelled a 'dreamer' as a child so exercises such as 'Make a list of ten things that inspire you' are quite exciting for me.
Water Paper Paint by Heather Smith Jones
I've been following Heather's blog for several years (love her studio) so I was excited to see her book on watercolour and mixed media. It's filled with technique and is once again a visual feast.
Print Workshop by Christine Schmidt
This is definitely a technique book with directions on how to create at home with a variety of printing techniques. It's also filled with great project ideas, including a step-by-step on making your own aspen wall which was interesting to read since I created my own birch wall for my daughter's room last winter.
Painted Pages by Sarah Ahearn Bellemare
The artist, Sarah, seems like such a sweet soul and her work is so soft and beautiful. The focus of this book is sketchbooks & mixed media but my absolute favorite part is the gallery of her work at the end. Such light-hearted and colour-filled work that resonates with a vintage feel and honouring of the past.
Daring Adventures in Paint by Mati Rose McDonough
This is one of my favorites and I have read it cover-to-cover several times. I love her reflections & questions...designed to help you find your flow, trust your path and discover your authentic voice. Her work is whimsical and very, very happy. There was just something about the way she presented her material that I connected with.
Inner Excavation by Liz Lamoreux
This book appeals to me particularly because of the poetry and artist's interviews. It's filled with great, great writing prompts and I love the chapter titles: I Begin, I Seek, I Gather...I Know. I find that writing helps to feed my painting, even when I don't share it, and vice versa.
Printmaking + Mixed Media by Dorit Elisha
This is a great book on techniques and projects for printmaking in many forms - screen printing, monotype, collagraph, relief, sun - and is once again filled with lovely images.
Unfurling by Misty Mawn
This book is really lovely to look at and filled with a ton of inspiration. I love the fact that it begins with drawing, as that is something anyone can do anywhere, and really spending that time to draw will enhance anybody's art process (also a great way to get those creative juices flowing). My daughter loves to draw faces so this is a great book with tips and techniques. It's also filled with fabulous quotes.
Many of these books overlap, using similar techniques and materials, and yet the work is all so individual to its maker. Love that. Such is art.
Throughout the years, my mentors have been teachers and artists who shared the materials they used and how they used them, designers who taught me how to simplify my presentation which includes my website and my artwork (such as not framing my works but rather leaving the edges visible as part of my practice), gallery directors who took the time to teach me how to connect with them, and employers who taught me the value of professionalism.
The books I read, whether fiction or nonfiction, have helped me work towards the creative career I envisioned for myself in many ways. Whether it was through artistic inspiration or understanding myself better, I have always found books to be invaluable. As I’ve been studying psychology, I have learned that reading helps create connections in my brain, which I believe helps me to understand what I should do and why. This includes what I should paint, what I should be involved in as far as exhibits or other creative projects, and to pay attention to how things make me feel, which always leads me to solidify the different bodies of work that I create.
Discussions with others, whether they are creatives themselves or not, always help guide me in the direction I need to go. There are times I wonder why I’m creating a certain thing, and speaking about it with others helps to clarify my thoughts. It also guides me in sometimes letting certain ideas/things go (on occasion for a short time and on other occasions permanently).
Most of all, I hope this has been of some help to you as learning these things over the years has helped me.