Exploring the Art of Travel Journalling:
Embarking on a journey, whether near or far, opens the door to a world of experiences waiting to be captured and remembered. One way to preserve these moments and turn them into cherished artifacts is through the art of travel journalling.
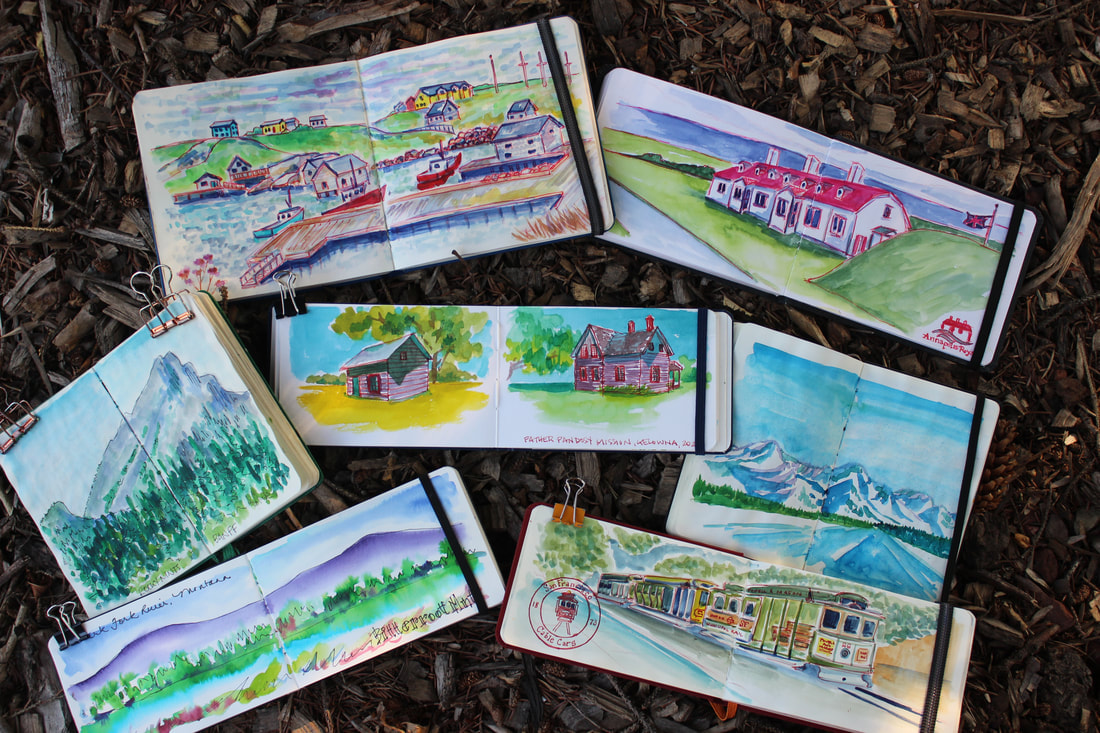
For me, keeping a travel journal has become a deeply fulfilling art form, a passport to reliving my adventures and emotions long after the journey ends. It's a way to encapsulate the essence of a place and time, and through this workshop I'm excited to share my travel journalling techniques and practices with you.
In this workshop, we'll dive into the world of travel journalling together. I'll introduce you to my personal sketchbooks, offering insights into how I work while traveling and how I transform my experiences into captivating visuals. We'll explore watercolours, and I'll demonstrate how to create beautiful entries with minimal supplies, making it easy to carry your artistic passion with you on your journeys.
Whether you aim to document your past travels or seek inspiration for future ones, this workshop promises to be a rewarding experience. It will ignite your imagination and transform how you document your journeys, allowing you to capture the essence of your adventures in a way that words alone simply cannot. Join us on this artistic voyage into the world of travel journalling, where every page becomes a portal to your fondest memories.
Description:
I have always wanted to utilize a sketchbook regularly, especially when I travel. As I pay close attention to my surroundings and really focus on the things that catch my attention, I find that it helps me to remember the trip more vividly than any photograph. There were two things that I needed in order to embrace this process:
1. The supplies had to be simple, lightweight and accessible.
2. I had to love using them.
I struggle with adhesive capsulitis in both of my shoulders so I recognized early on that the materials I use cannot be heavy as I tend to walk long distances on travels. After attempting many different options for sketching on the go, I finally found something that works well for me.
Supplies:
Step-By-Step:
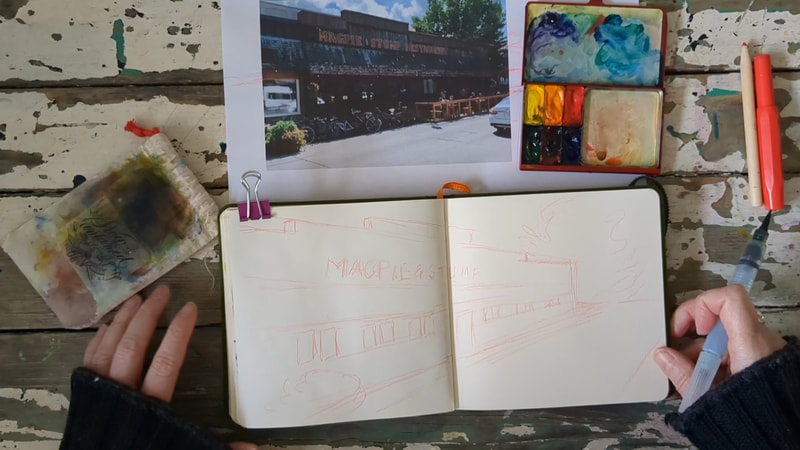
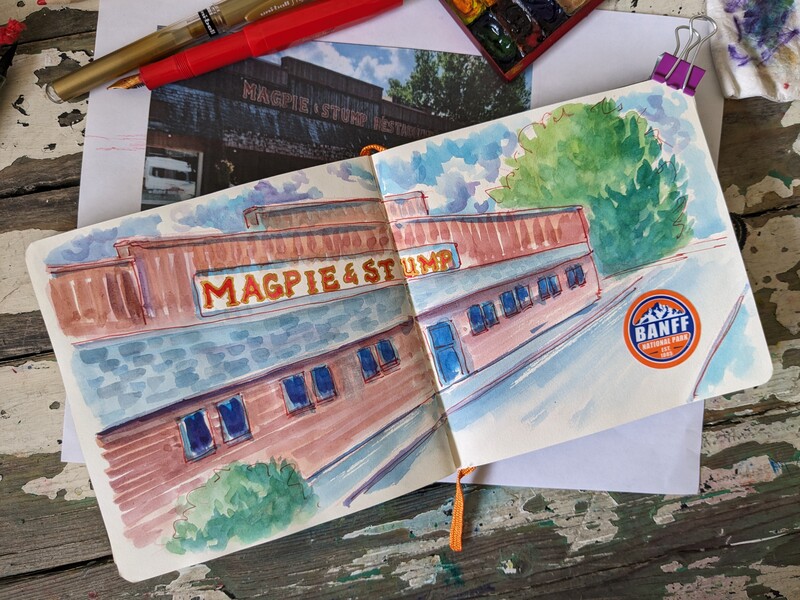
1. PHOTO: The first thing I do when I arrive at a location is to take a photograph using my phone. In this way, if I can’t stay too long or finish what I’ve begun, I can continue to work on my next stop. This is especially helpful when I’m with others so that I don’t hold them up. I also like to photograph any signage that may come in handy to complete my sketch (ie. Road signs, business signage, maps, neighborhood information).
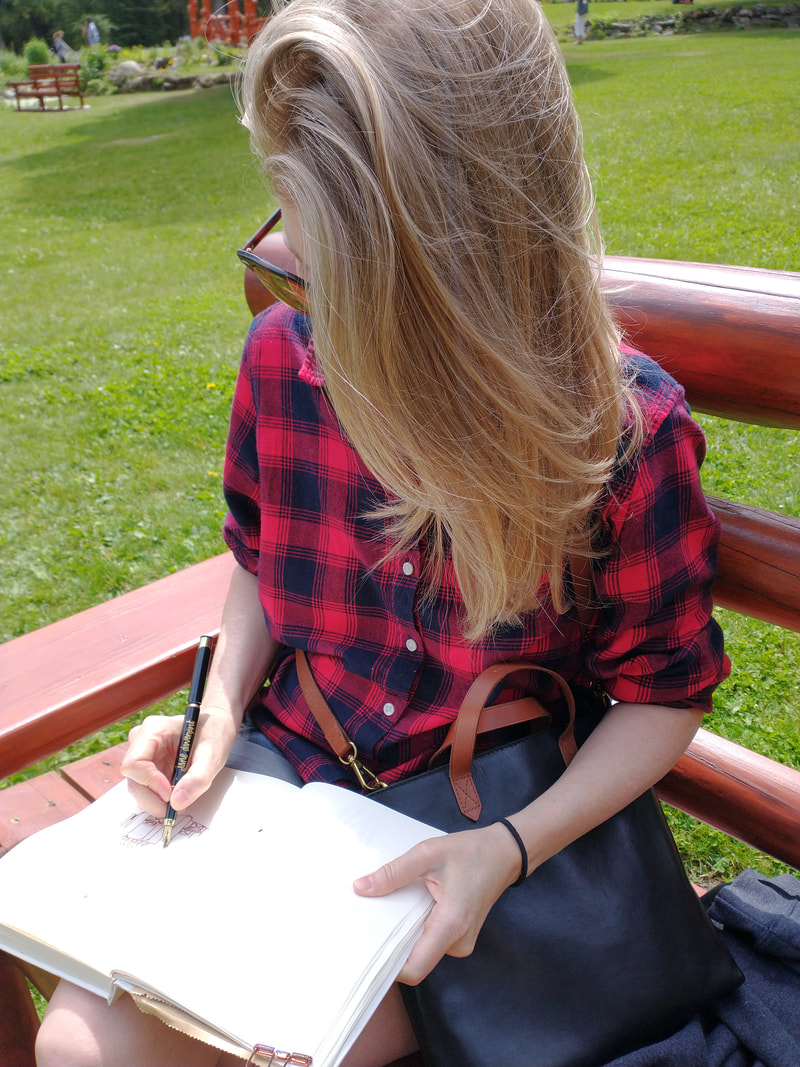
2. SKETCH: Then I create a simple sketch, selecting the objects/buildings that are most important to me. Using a pencil crayon forces me to stop worrying about perfection as I don’t erase…I always think that any extra lines/marks just add interest. I’m not concerned about anything being perfect as, for me, it is more about the feeling of a place than an exact replica. Keep in mind, the horizon line in the distance will be p on your page if you’re lower (ie. Sitting on the ground) and lower if you’re at a higher altitude (ie. A building or mountain). An image typically looks more interesting if it sits around 1/3 from the top or bottom of your page.
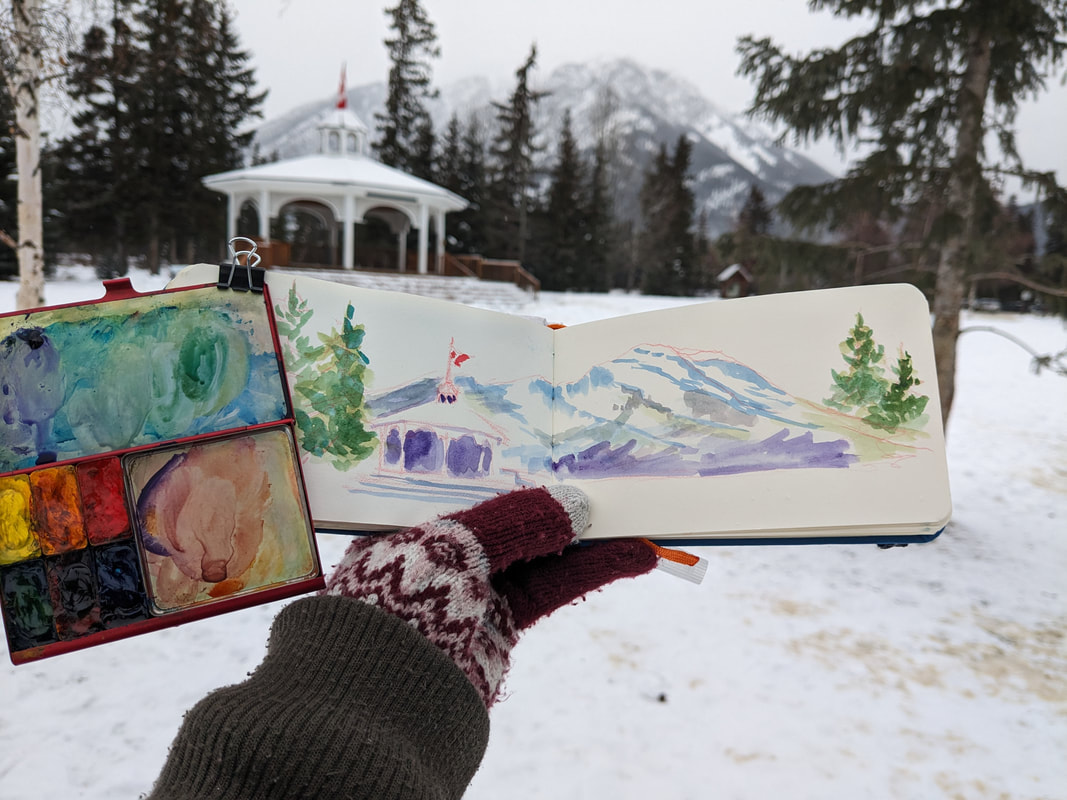
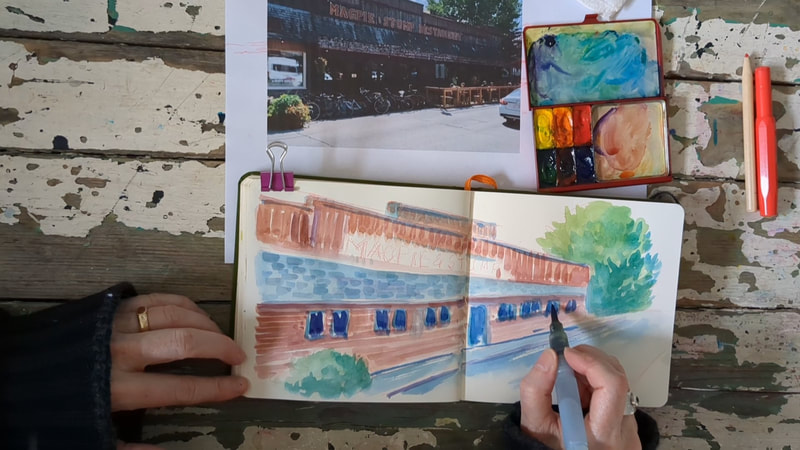
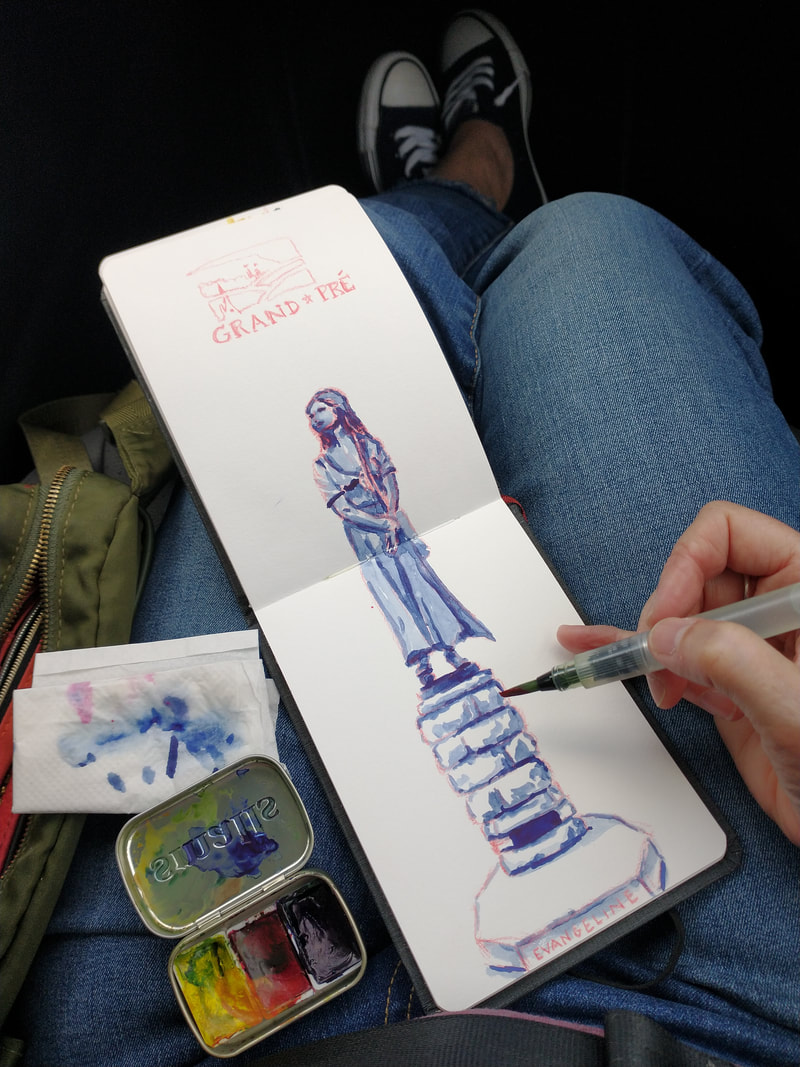
3. PAINT: At this point I begin to add colour with the watercolour paint and waterbrush. Since it is so thin, the pocket palette can be clipped to my sketchbook if I don’t have a bench or dry ground to sit on while I work. I keep working around the sketch, allowing different portions to dry, though working outside does speed up the drying process. Layering colours and patterns at this point adds interest to the final sketch. I include or exclude whatever shapes or colours I choose (ie. Leaving white behind signage so lettering pops).
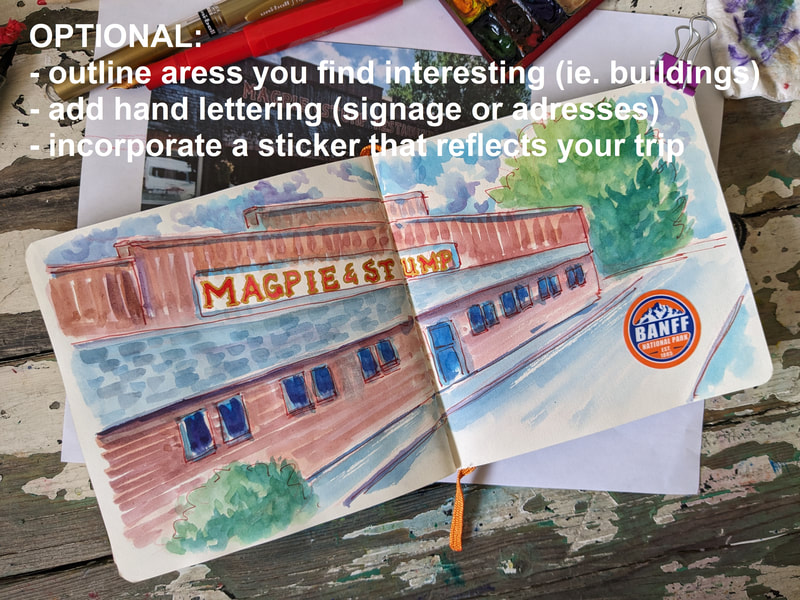
4. DRAW: Once dry, I use the fountain pen to outline parts of the image that I want to highlight. I find that outlining in red really helps the image to ‘pop’ though I have used many different colours until I narrowed it down to red. I also use a combination of paint and/or the fountain pen to add labels such as a street name.
5. DETAILS: If there are no signs nearby, I will often come up with my own title (ie. Name of a village or neighborhood) and will type it into Dafont.com to try out different fonts. Again, since I’m not concerned about making a perfect representation, I loosely copy the word(s) and font onto my image. If I can find a sticker that represents the place, I like to incorporate that.
OPTIONAL: Once I’ve returned home, if I feel that an image requires it, I occasionally work back into the completed sketch using a white gel pen (ie. Uniball Signo Fine) to add highlights.
Tips:
Embarking on a journey, whether near or far, opens the door to a world of experiences waiting to be captured and remembered. One way to preserve these moments and turn them into cherished artifacts is through the art of travel journalling.
For me, keeping a travel journal has become a deeply fulfilling art form, a passport to reliving my adventures and emotions long after the journey ends. It's a way to encapsulate the essence of a place and time, and through this workshop I'm excited to share my travel journalling techniques and practices with you.
In this workshop, we'll dive into the world of travel journalling together. I'll introduce you to my personal sketchbooks, offering insights into how I work while traveling and how I transform my experiences into captivating visuals. We'll explore watercolours, and I'll demonstrate how to create beautiful entries with minimal supplies, making it easy to carry your artistic passion with you on your journeys.
Whether you aim to document your past travels or seek inspiration for future ones, this workshop promises to be a rewarding experience. It will ignite your imagination and transform how you document your journeys, allowing you to capture the essence of your adventures in a way that words alone simply cannot. Join us on this artistic voyage into the world of travel journalling, where every page becomes a portal to your fondest memories.
Description:
I have always wanted to utilize a sketchbook regularly, especially when I travel. As I pay close attention to my surroundings and really focus on the things that catch my attention, I find that it helps me to remember the trip more vividly than any photograph. There were two things that I needed in order to embrace this process:
1. The supplies had to be simple, lightweight and accessible.
2. I had to love using them.
I struggle with adhesive capsulitis in both of my shoulders so I recognized early on that the materials I use cannot be heavy as I tend to walk long distances on travels. After attempting many different options for sketching on the go, I finally found something that works well for me.
Supplies:
- Sketchbook
- Butterfly Clip
- Pencil/Pencil Crayon
- Waterbrush
- Watercolour Palette
- Pen/Micron
- OPT. White Gel Pen
- 3.5x5.5 or 5.5x5.5 inch Handbook Journal Co. Travel Sketchbook by Speedball
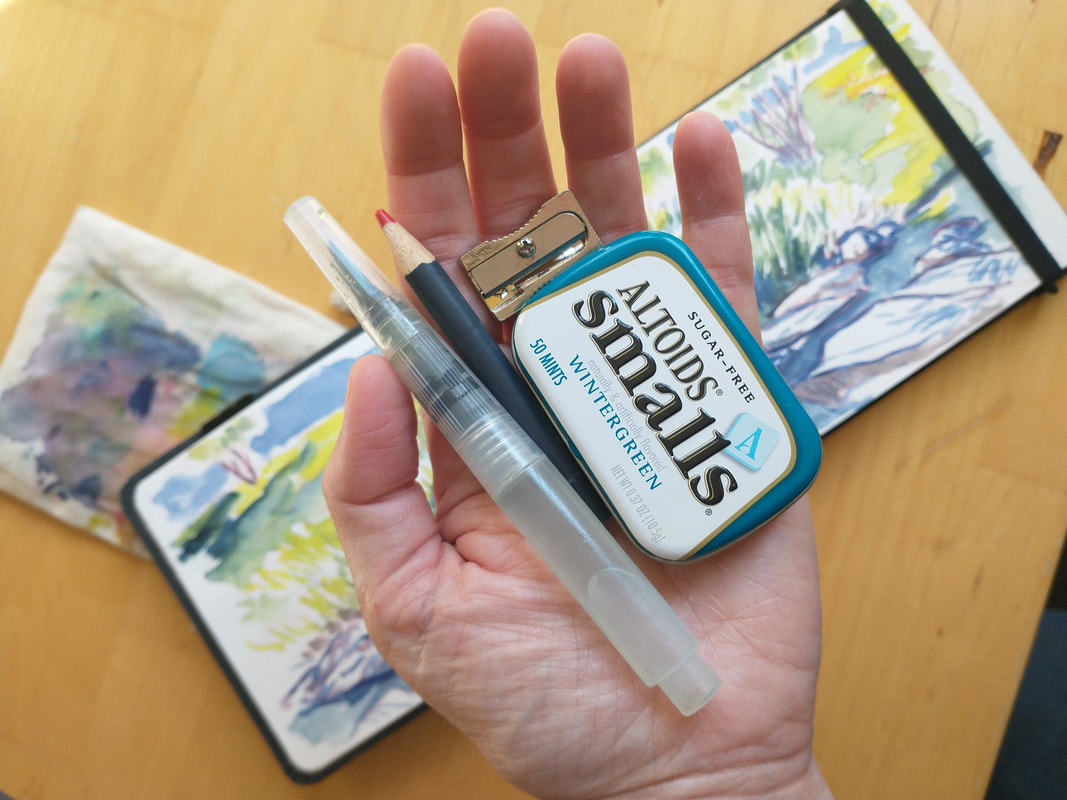
- Faber Castell Goldfaber red pencil crayon (cut in half) & sharpener
- Pentell Mini Waterbrush
- Primary colours in mint tin, VivaJoan.com (ie. permanent rose, yellow, cerulean), or mini Altoids tin (hansa yellow, quinocradone magenta, Indanthrone blue)…I house my supplies in a Midori pencil case that straps onto my sketchbook)
- or ArtToolkit.com Pocket Palette with primary & secondary colours (ie. M.Graham azo yellow, Indian yellow, napthol red, sap
- Kaweco Sport fine fountain pen, converter and D’Atramentis Document Permanent Ink in red
Step-By-Step:
1. PHOTO: The first thing I do when I arrive at a location is to take a photograph using my phone. In this way, if I can’t stay too long or finish what I’ve begun, I can continue to work on my next stop. This is especially helpful when I’m with others so that I don’t hold them up. I also like to photograph any signage that may come in handy to complete my sketch (ie. Road signs, business signage, maps, neighborhood information).
2. SKETCH: Then I create a simple sketch, selecting the objects/buildings that are most important to me. Using a pencil crayon forces me to stop worrying about perfection as I don’t erase…I always think that any extra lines/marks just add interest. I’m not concerned about anything being perfect as, for me, it is more about the feeling of a place than an exact replica. Keep in mind, the horizon line in the distance will be p on your page if you’re lower (ie. Sitting on the ground) and lower if you’re at a higher altitude (ie. A building or mountain). An image typically looks more interesting if it sits around 1/3 from the top or bottom of your page.
3. PAINT: At this point I begin to add colour with the watercolour paint and waterbrush. Since it is so thin, the pocket palette can be clipped to my sketchbook if I don’t have a bench or dry ground to sit on while I work. I keep working around the sketch, allowing different portions to dry, though working outside does speed up the drying process. Layering colours and patterns at this point adds interest to the final sketch. I include or exclude whatever shapes or colours I choose (ie. Leaving white behind signage so lettering pops).
4. DRAW: Once dry, I use the fountain pen to outline parts of the image that I want to highlight. I find that outlining in red really helps the image to ‘pop’ though I have used many different colours until I narrowed it down to red. I also use a combination of paint and/or the fountain pen to add labels such as a street name.
5. DETAILS: If there are no signs nearby, I will often come up with my own title (ie. Name of a village or neighborhood) and will type it into Dafont.com to try out different fonts. Again, since I’m not concerned about making a perfect representation, I loosely copy the word(s) and font onto my image. If I can find a sticker that represents the place, I like to incorporate that.
OPTIONAL: Once I’ve returned home, if I feel that an image requires it, I occasionally work back into the completed sketch using a white gel pen (ie. Uniball Signo Fine) to add highlights.
Tips:
- Pick and choose the items or buildings you want to include…from selecting the shape of trees to the number and location of buildings – leave out whatever you’re not interested in.
- I usually choose single-point perspective for ease (all buildings come together at a single point either centered on my sketchbook or off to the left- or right-hand side).
- Not all lines, shapes and marks have to be included in order to be recognizable…for example, not every banister on a railing needs to be included, if a few lines suggest a railing, the viewer’s eye will fill in the rest.
- Using the same colour at different parts of the sketch will unify it (ie. Using some of the green from the grass or trees on the road or buildings or sky as well).
- Also, using a limited palette ensures cohesion as all of your images will complement one another.
- A limited palette of 3 primary or 6 primary+secondary colours also makes decisions/choices easier and, therefore, quicker when painting on location.
- The more images you add to your sketchbook, the more interesting it will become and you will begin to see your style emerge.
